breely.com Conversion Tracking with Google Tag Manager
Why Do Conversion Tracking?
Fastest way to get new clients to make Breely bookings, is running paid ads. In Google Ads, you can target specific searches, e.g. if you’re a massage therapist, you could show ads to your website when someone Google’s “best massage therapist New York”. In Meta, you can target users interested in specific things like sports, or just let Meta handle targeting for you.
If you run paid ads, you should measure how effective your ads are. After all, you are not interested in getting clicks, you’re interested in getting new clients booking via Breely.
With conversion tracking, you can see in detail, how many Breely bookings each ad campaign received.
Conversion tracking also improves ad performance. The same ads with tracking, get more conversions than without. This is because Meta, Google, and others like TikTok or LinkedIn learn what works, if conversion tracking tells the platforms which clicks led to conversions and which didn’t.
In a nutshell, conversion tracking gets you more bookings, for cheaper. Let’s go!
1) Create and Install a Google Tag Manager Container
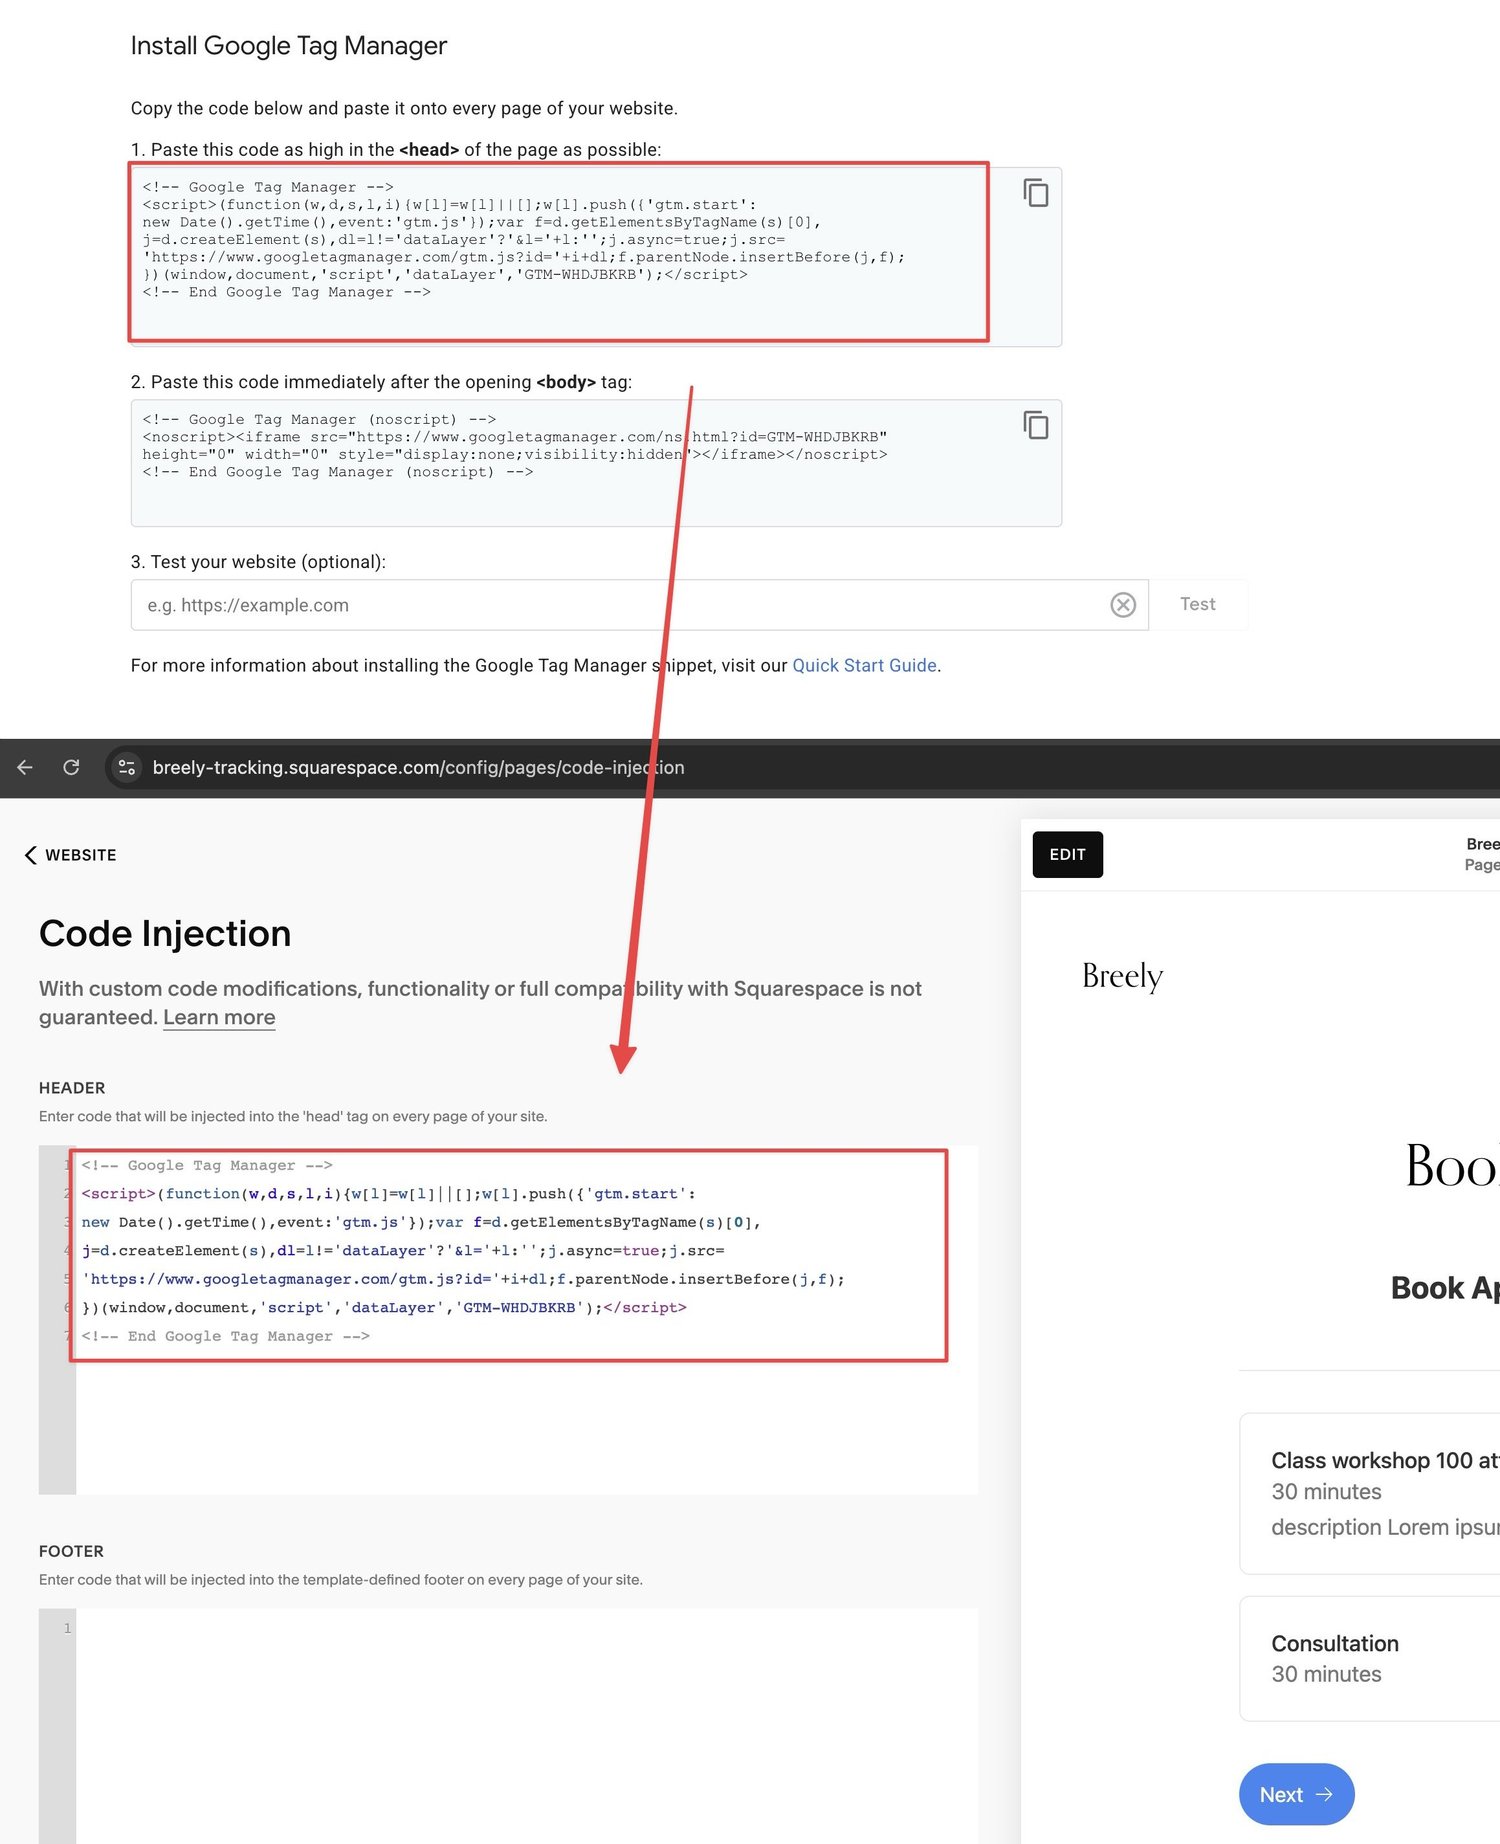
Google Tag Manager or “GTM”, is a free visual tool to track conversions. If you don’t have one yet, create a container and install it to your website following instructions Google Tag Manager provides.
- For Squarespace, copy-paste GTM snippet to Code Injection -> Header (requires professional plan)
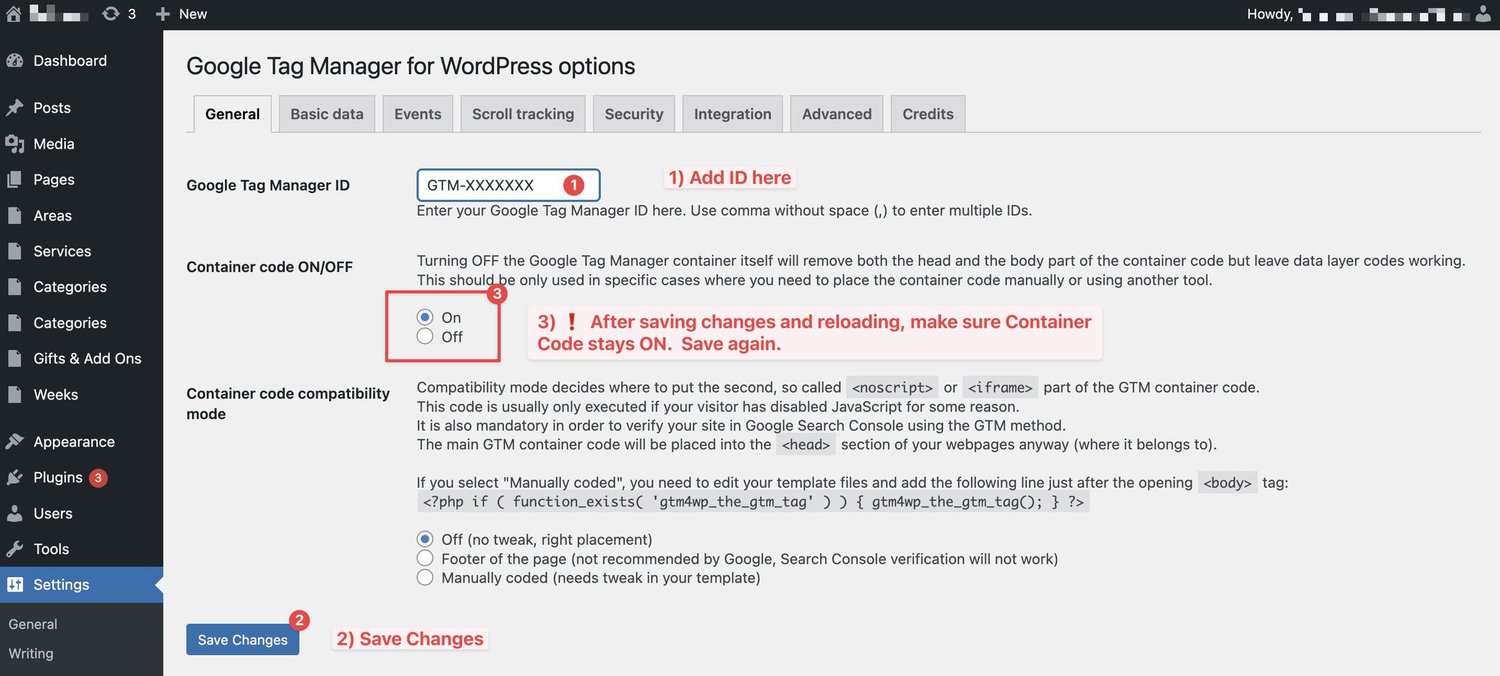
- In WordPress, we recommend GTM4WP plugin.
- You will find a tutorial for any platform via Google or Youtube. ChatGPT can also help you install GTM.
WordPress GTM Tip
If you use WordPress and GTM4WP plugin, there is a little gotcha. When you add your GTM ID and click save, the container may get turned off.
You need to turn Container Code “on” again, and click Save for a second time.
Make sure Google Tag Manager is installed
-
Use chrome, and install the Google Tag Assistant extension.
-
In GTM, click Preview and test with Google Tag Assistant. If Tag Assistant connects, GTM is installed properly.
2) Triggering conversions
There are two ways we can trigger breely conversions. We can embed Breely inside your website and use a custom event, or redirect to a thank you page after submission.
A) Recommended Trigger Method — Custom Event
Embed Breely to your website using the instructions in Breely → Forms → Your Desired form → Share → Embed in Webpage
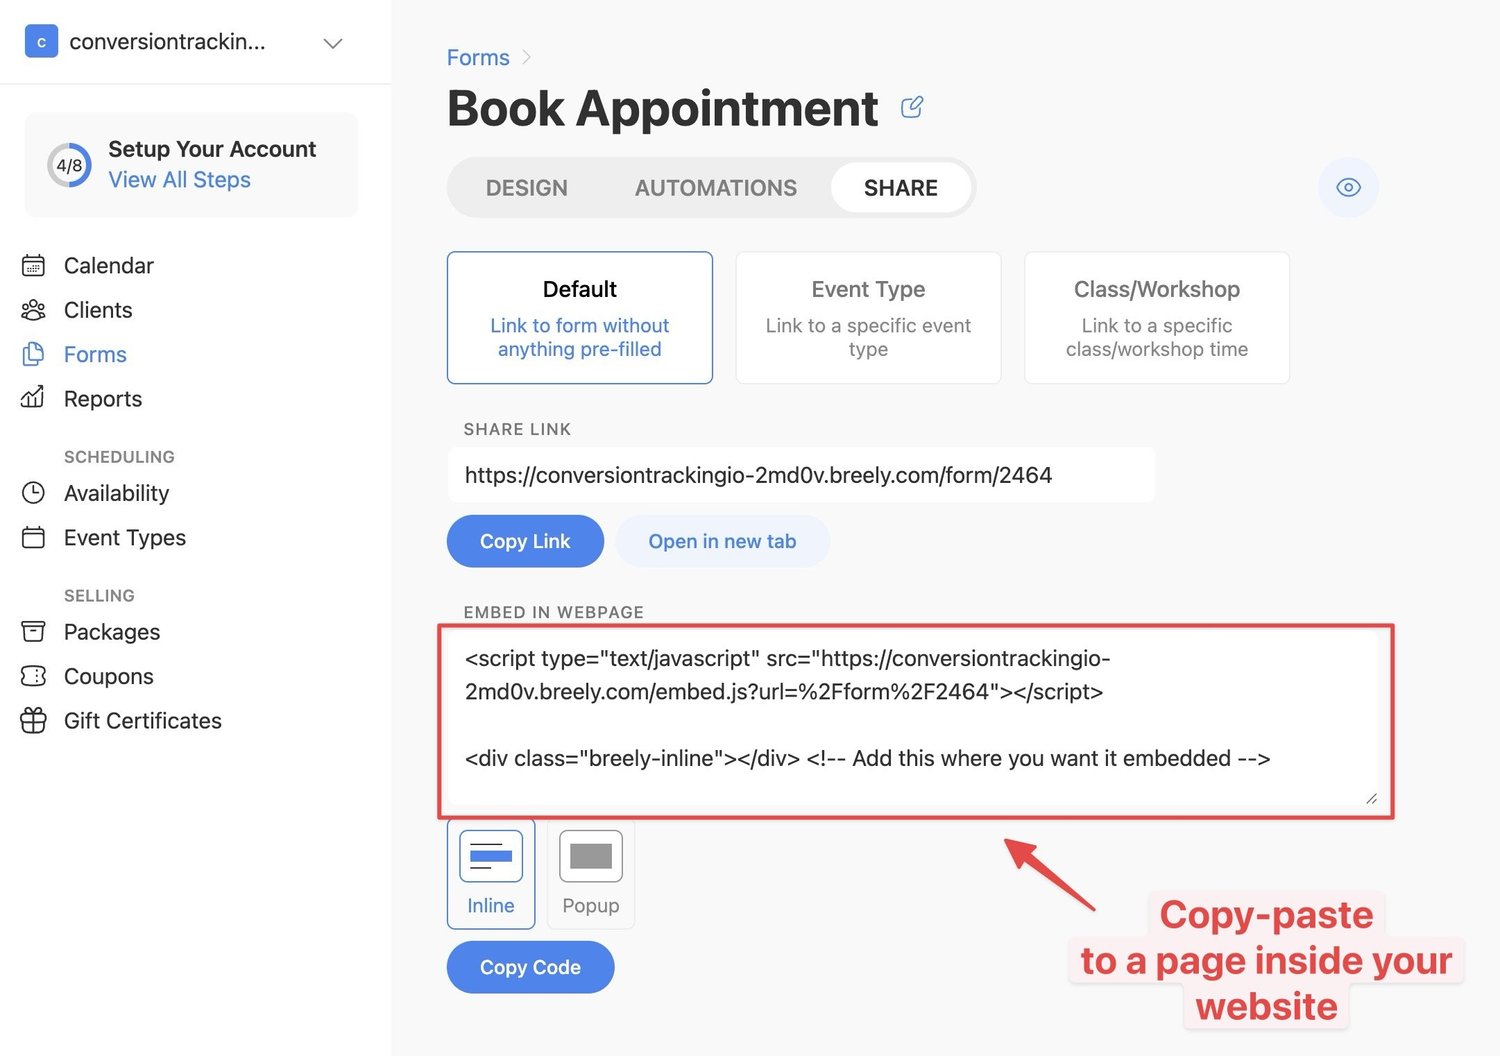
Embedding Breely inside your website, instead of having a link that takes visitors away from your website to Breely, makes tracking easier.
Create a trigger for Breely submission
- In Google Tag Manager, head over to triggers.
- Click new.
- Select Custom Event.
- Use breely_form_submitted as the custom event name.
- Click save.
B) Alternative Trigger Method — Thank you page
Many marketers prefer to trigger conversions by redirecting visitors to a custom thank you page like example.com/thank-you, after Breely is submitted. We recommend using the Method A instead but redirects also work.
- In Breely, go to forms
- Select your form
- Scroll down, and click SUBMISSION CONFIRMATION
- Add a thank you page url
- Click Save

- In Google Tag Manager got to Triggers
- New Trigger
- Page View
- Name doesn’t matter, e.g. “Breely Submit Thank You”
- Some Page views
{{Page Path}}— contains — thank-you (or what your thank-you-page URL)
Now we’re ready to send conversions.
3) Google Ads
For Google Ads, you must create new conversion goals in your Google Ads dashboard, and copy-paste the conversion ID and conversion label to a Google Ads conversion tag in Google Tag Manager, and connect your Breely trigger to fire it.
- In Google Ads, go to Goals and click + Create conversion action
- Add your URL if needed. Pick ‘Conversions on a website’ and continue.
- Choose conversion category. E.g. Submit Lead Form, or Purchase if you take payments via Breely
- Add conversion actions (web)
- Set up manually using code
- Add conversion settings (see our video for details)
- Proceed and click Use Google Tag Manager.
- in GTM, create new Google Ads conversion tag
- Copy-paste Google Ads Conversion ID and Conversion Label from Google Ads to the GTM tag, and pick your trigger.
- Test in Google Tag Assistant
4) Meta Pixel
For Meta Pixel, you can use a Meta Pixel template in Google Tag Manager, copy-paste your Facebook Pixel ID, and pick your event name. We recommend standard events like Lead, or Purchase.
- In GTM, create a new tag
- Click Template Gallery
- Search ‘Facebook’ and install Facebook Pixel by facebookarchive
- Create Page view tag, and copy-paste your Facebook Pixel ID
- Create Breely conversion tag, pick your event name, and trigger
- Test in Tag assistant and Meta Pixel Helper
5) Google Analytics
- Create GA4 property, and get the Measurement ID.
- in GTM, create a Google Tag and copy-paste ID. It’s triggered as Initialization - All Pages by default which works great
- in GTM, create GA4 event, use the measurement ID, choose your event name, e.g. generate_lead, form_submit, or anything custom, like breely_submit
- Test with tag assistant and GA4 debug mode
Testing
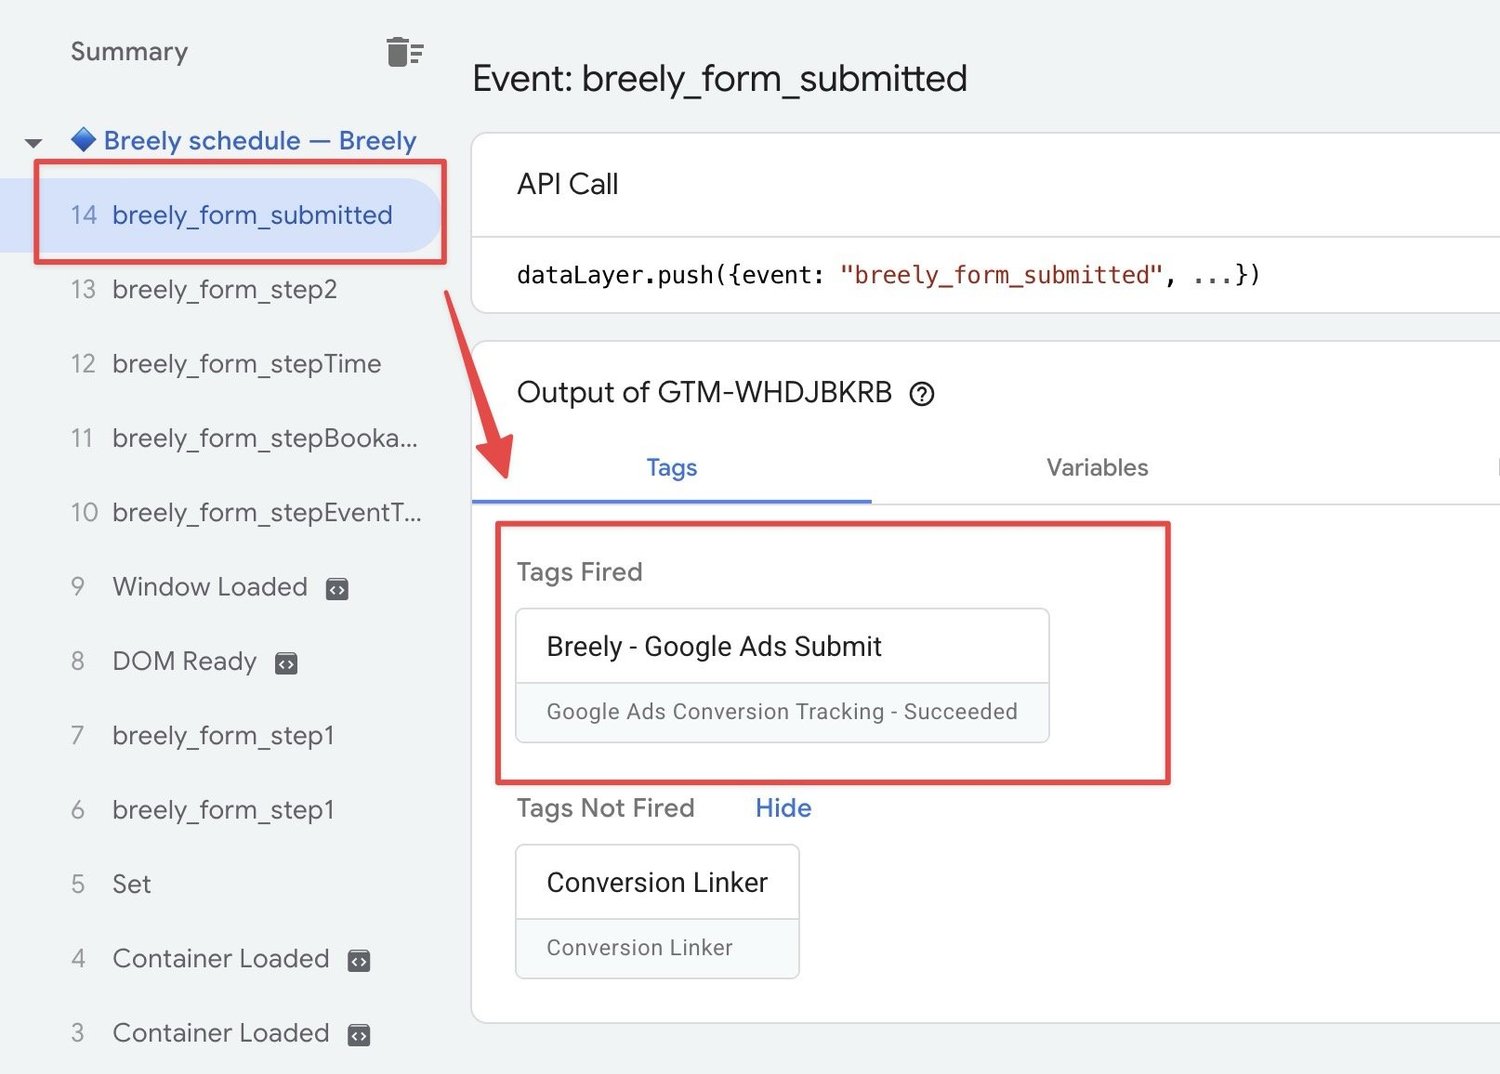
In GTM, click preview and make Breely test submissions.
You should see the trigger breely_form_submitted, and any tracking tags you added under Tags fired, like this
Validate each platform.
a) with Google Tag Assistant to make sure we are sending conversions
b) Inside the platforms to make sure conversions are receiving
- In Google Ads your conversions should turn from red Inactive to “No recent conversions”
- In Meta, the Meta Pixel Helper should show the conversion, and in Facebook Data Sources -> Test events, you should see the conversion
- In Google analytics, under Debug mode, you should see conversions coming in
- in Microsoft (Bing) Ads use UET Tag Helper to make sure events are sending, and wait some time for conversions to turn active inside the dashboards
- Linkedin does not have an official pixel helper, but use third party chrome extensions and see conversions validate inside your ad manager.
Publish
Once you’ve tested your tags, the last step is to click Publish inside Google Tag Manager. This is often forgotten, so make sure to remember to Submit.

6) Advanced extras
Field Values
You can access the field values of Breely submission, like name, email, phone or other questions your form asks for.
- create filters for different types of Breely submissions. For example, a scheduled appointment VS a contact form submit.
- Add more info to tracking tags with data layer variables, like:
- submission ID
- currency and value
- first party data like email, name, phone number
- any custom field value. If you sell solar panels, in Breely you could ask “For a business or a house?”, and fire different conversions based on type of conversions.
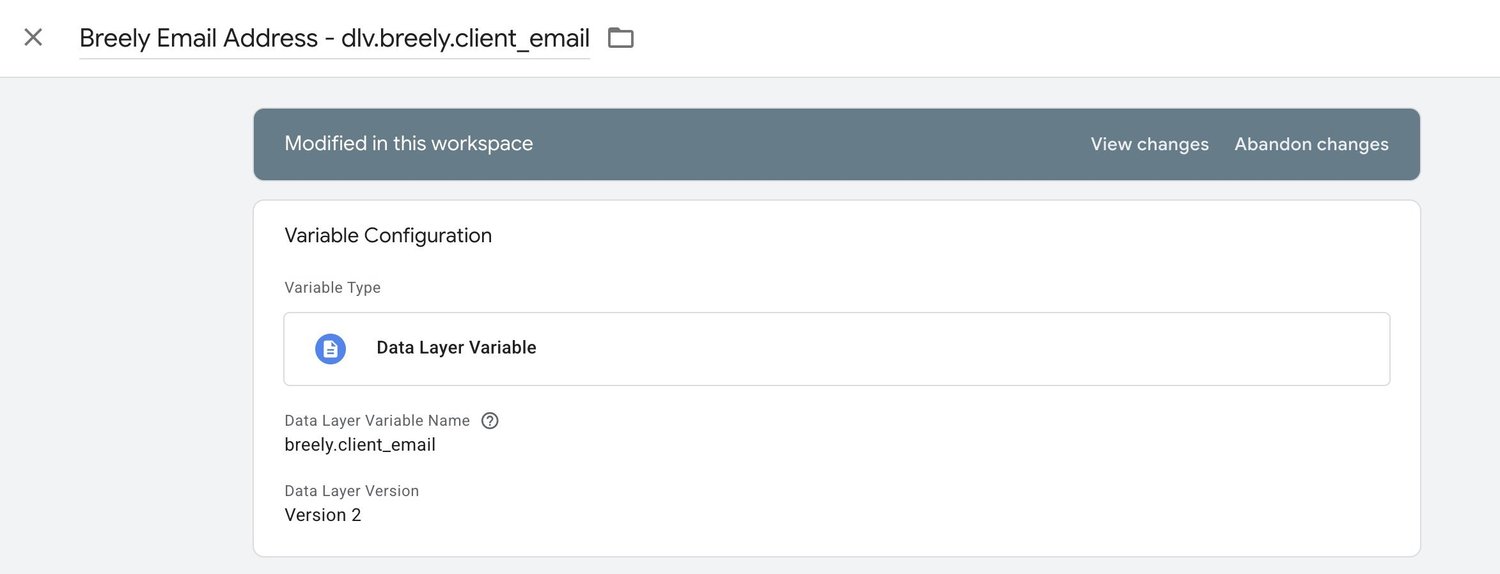
Example—how to get the email address from Breely form submission
Example values for Data Layer Variables
- breely.submission_unique_id
- breely.eventtypename
- breely.client_phone
- breely.client_email
- breely.client_last_name
- breely.client_first_name
- breely.client_full_name
- breely.amount_paid_when_submitted
- breely.currency
- breely.is_new_client
- breely.form_conversion_type
- breely.client_has_upcoming_appointment