
ChatGPT Ads Conversion Tracking: How to Set It Up
In the 1950s you ran an ad in a newspaper or on the side of a bus. Maybe sales went up that month. Maybe they didn’t. There was no way to know which ad drove which customer, what you paid to acquire them, or whether the whole thing made you money.
Digital changed that. With Google Ads, Meta, and now ChatGPT Ads, every click is traceable. You should be able to see exactly how many conversions each ad produced, the value of those conversions, your cost per conversion, and your cost to acquire a customer. Sometimes those last two are the same number. Sometimes they’re not — depends on your funnel. Either way, you need to see them.
Most advertisers don’t set this up. They run ads, watch the clicks, and have no idea if any of it worked. That’s just burning money with extra steps.
Conversion tracking also does something else on mature platforms like Google and Meta: it feeds the algorithm. When you tell Google “this is a conversion,” it learns what kind of person converts and finds more of them. Tracking is what turns “maximize clicks” into “maximize conversions.” Same budget, better results.
ChatGPT Ads are early. Whether the algorithm is already optimizing for conversions the way Google does isn’t totally clear yet. But it’s coming — and the advertisers with tracking already in place will be ahead when it does.
Here’s how to set it up.
Create a Data Source (Your Pixel)
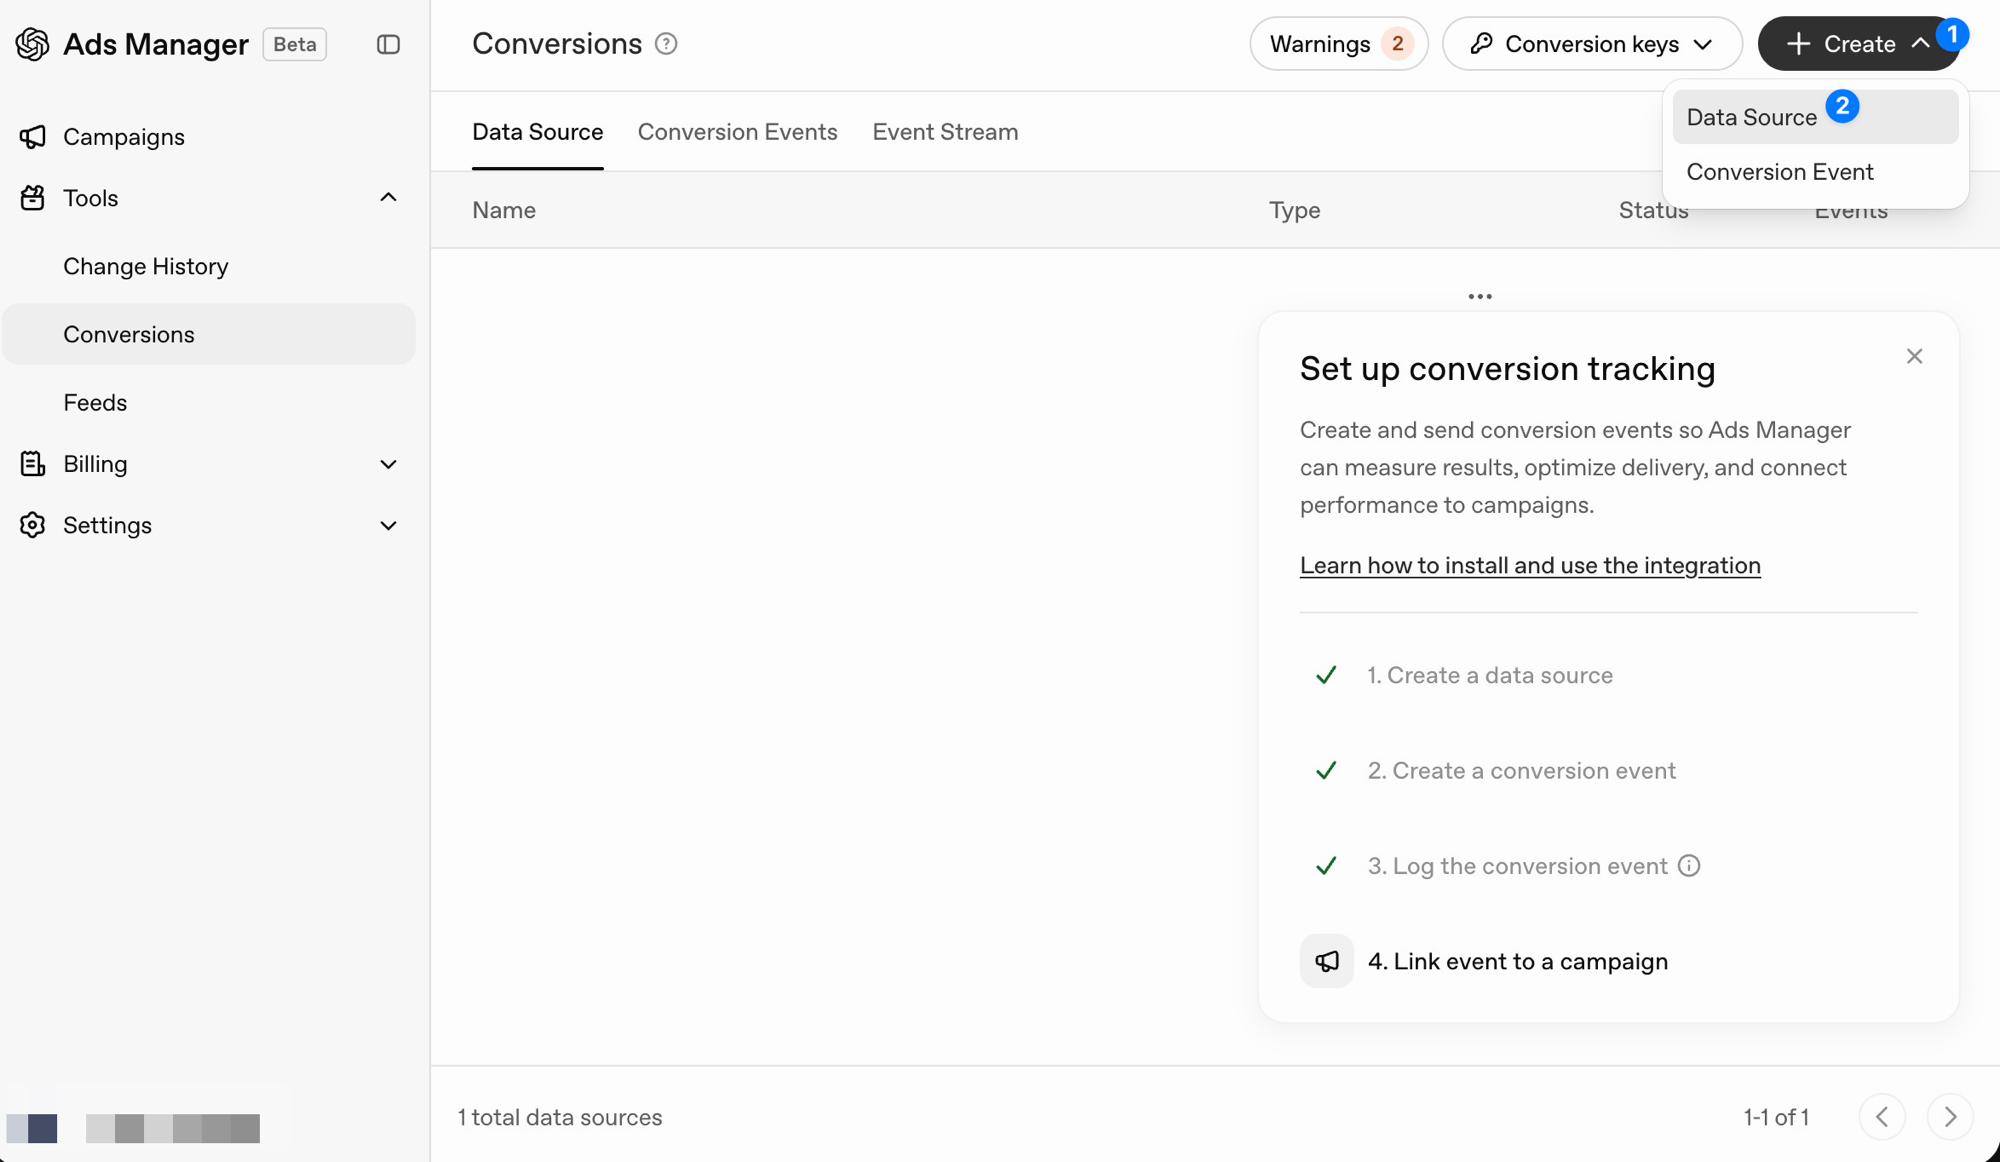
Go to ads.openai.com → Tools → Conversions.
Click + Create → Data Source.
Give it a name like mywebsite.com OpenAI Pixel. Keep the type as Web. Click Create.
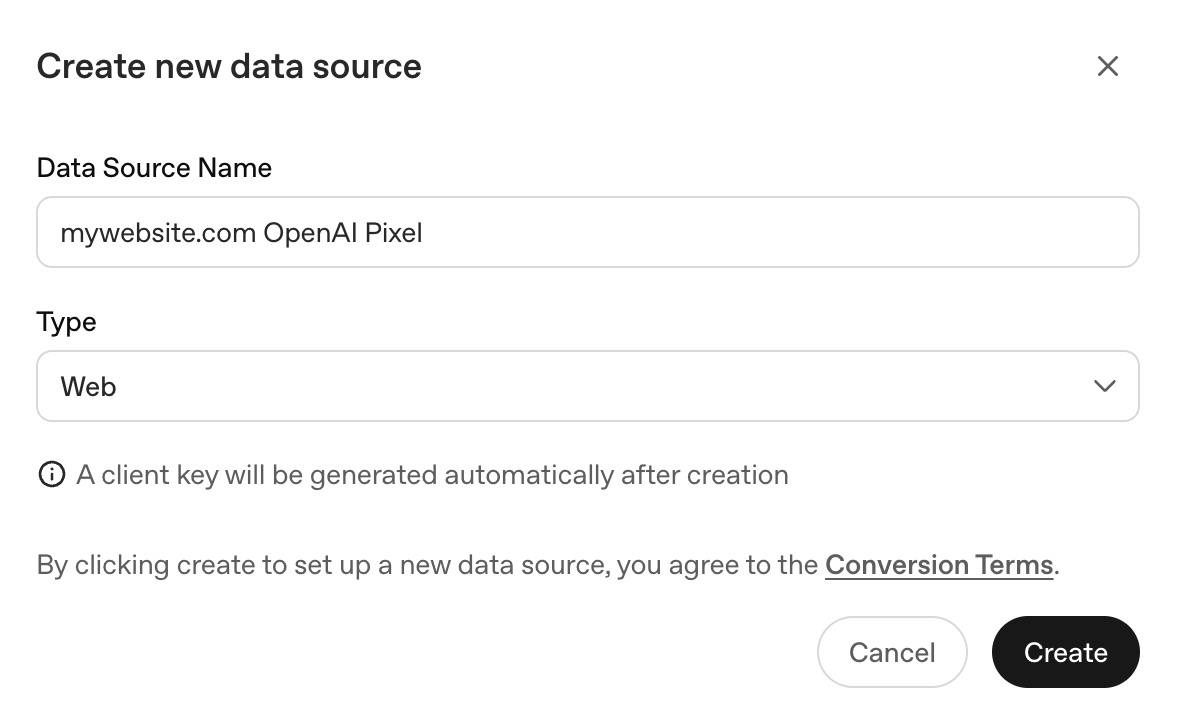
A client key (your Pixel ID) will be generated automatically.
If you’ve ever set up a Meta Pixel, this is the exact same concept. One pixel per website.
Set Up Google Tag Manager
If you don’t have Google Tag Manager on your site yet:
- Go to tagmanager.google.com and create a new container for your website
- Copy the GTM snippet and paste it into your website’s HTML — once in the
<head>, once after the opening<body>tag - Where to paste it depends on your platform:
- WordPress — use the GTM4WP plugin or any Code Snippets plugin
- Squarespace — go to
yoursite.squarespace.com/config/pages/code-injectionand paste it there - Shopify — edit your theme and paste the GTM code into your theme’s
<head>, as high up as possible
You can find GTM installation tutorials for any platform on YouTube.
Install Google Tag Assistant
Install Google Tag Assistant in Chrome. Use Tag Assistant — not “Tag Assistant Companion”, which is a different extension. Google has both and it’s confusing.
This extension lets you debug your GTM setup and see which tags fire in real time.
Verify GTM Is Installed
In GTM, click Preview. A window will open — browse to your website in it.
Open the Tag Assistant Chrome extension. You should see your GTM container ID listed and active. If it shows up — GTM is installed correctly on your site.
WordPress users: If GTM doesn’t appear, flush your caches first. Caching plugins like WP Rocket can serve a cached version of your site that doesn’t include the newly added GTM snippet. Clear all caches and try again.
Add the OpenAI Pixel to GTM
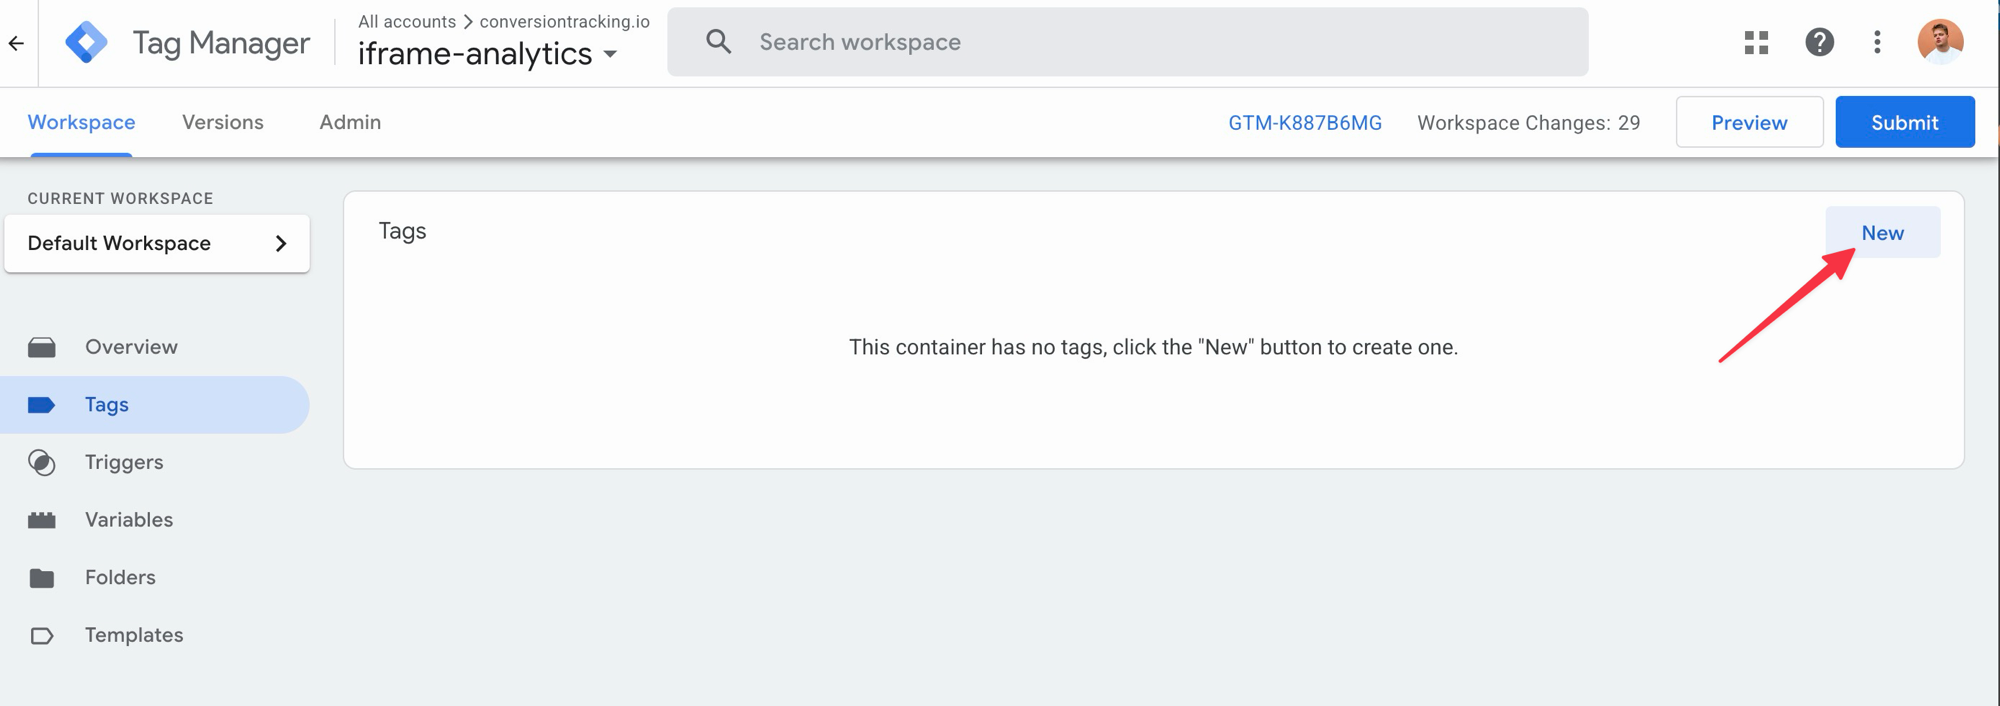
In GTM, go to Tags and click New.
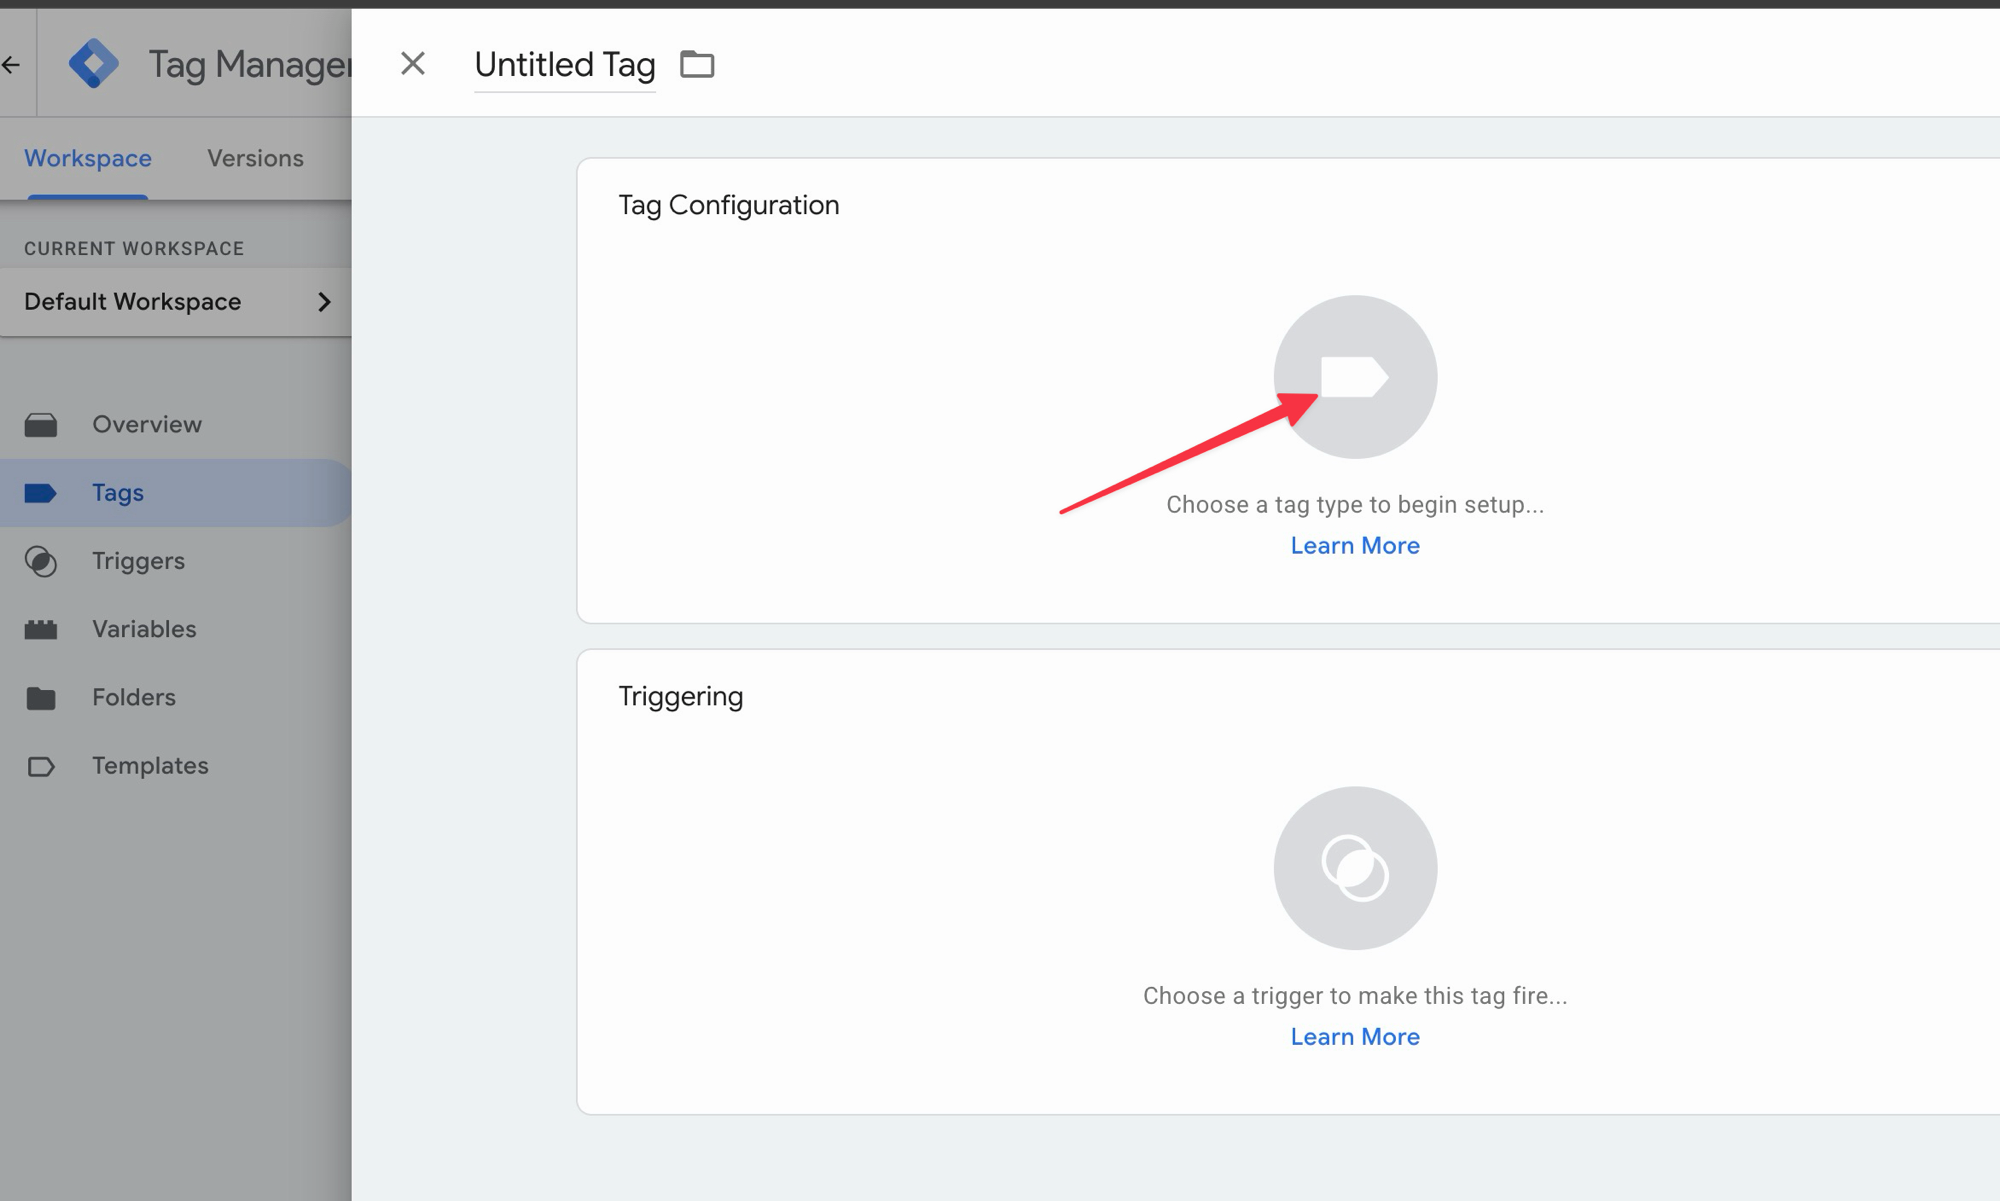
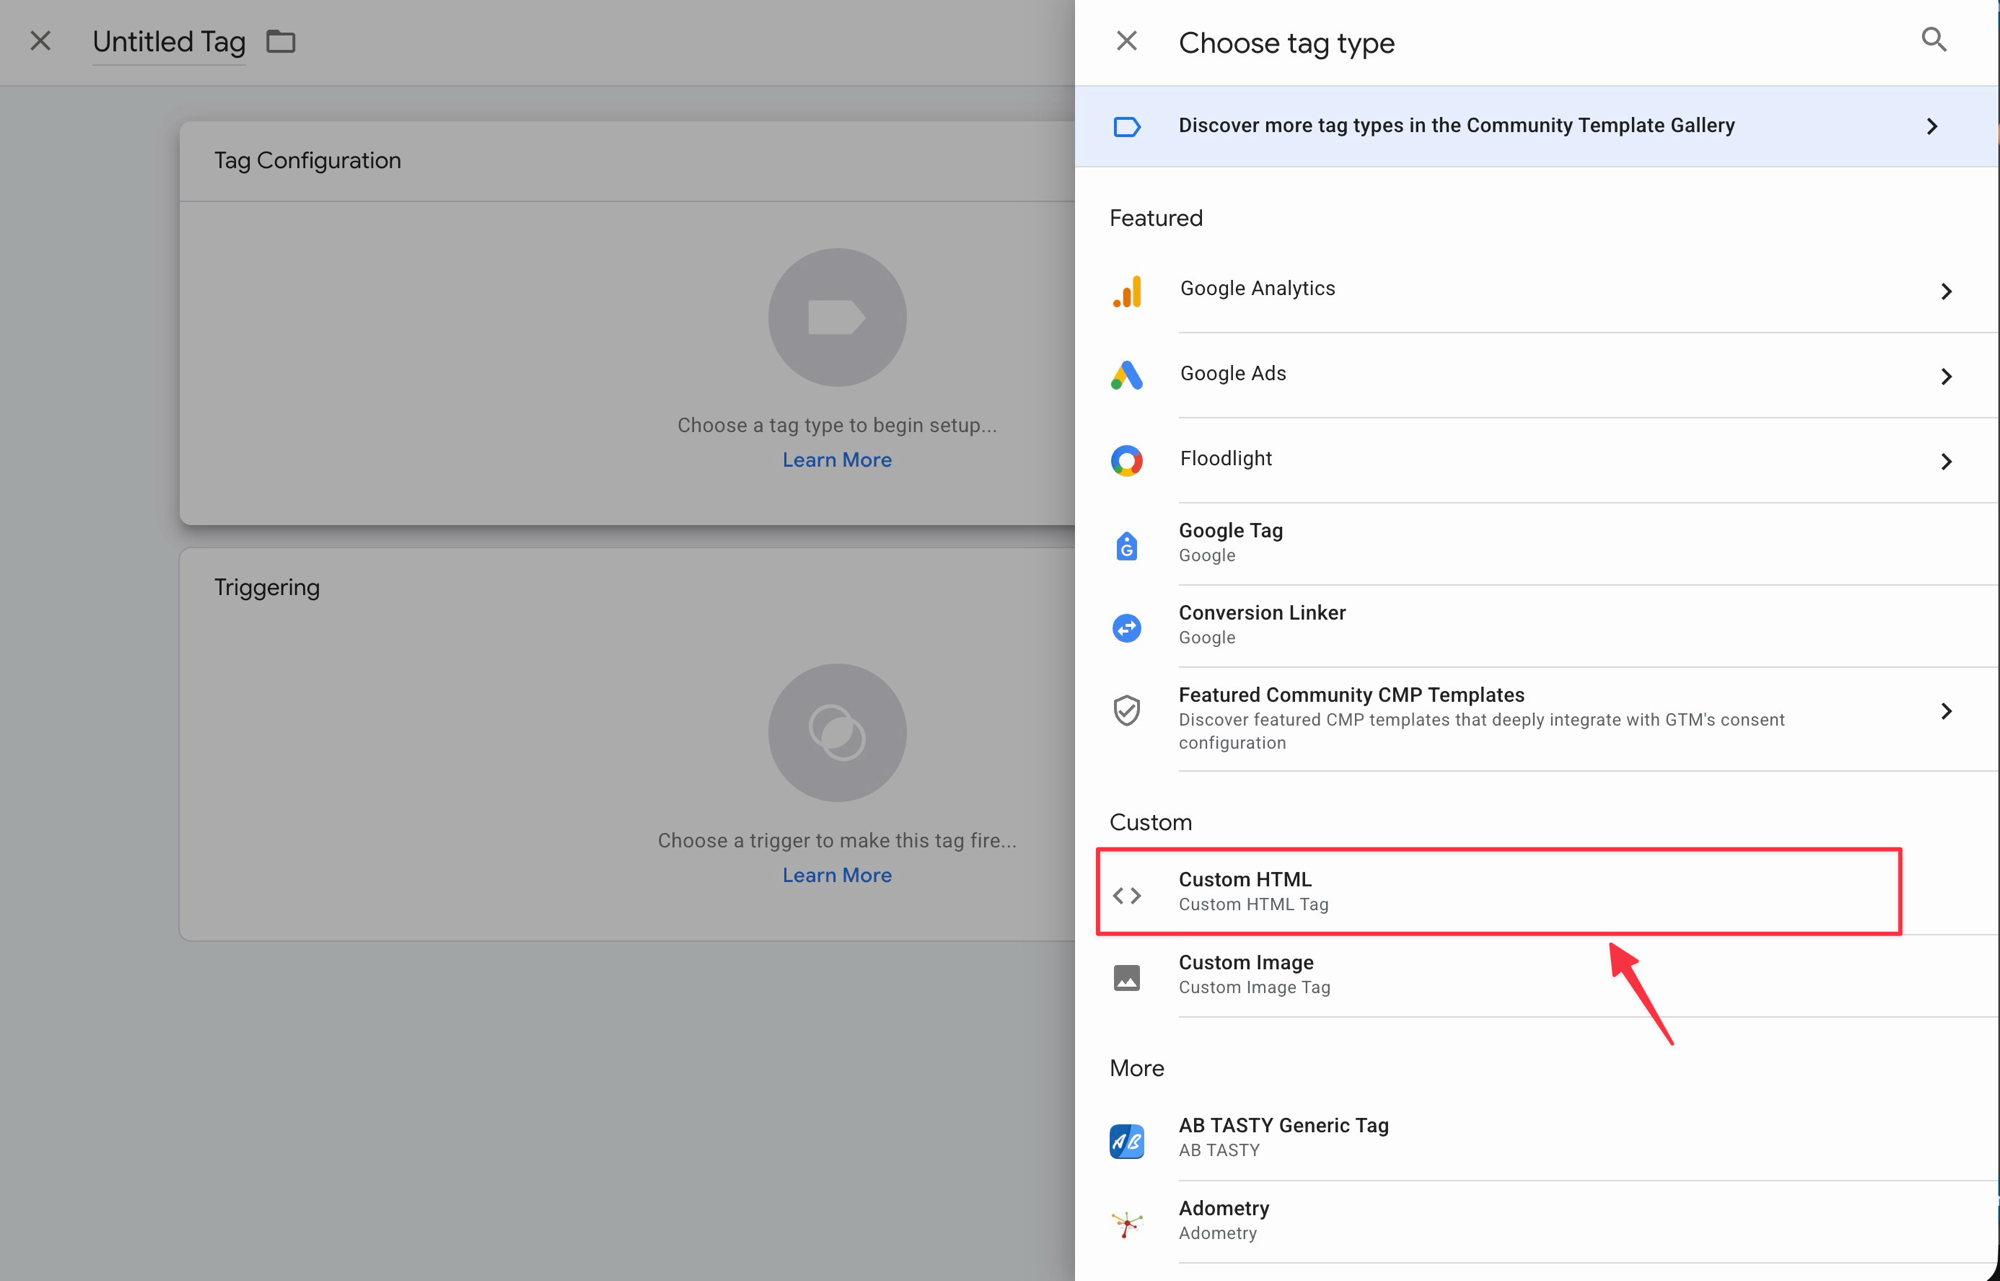
Click the Tag Configuration area to choose a tag type.
Select Custom HTML from the list.
Paste your OpenAI Pixel setup code (click the three dots → View Code next to your data source to get it).
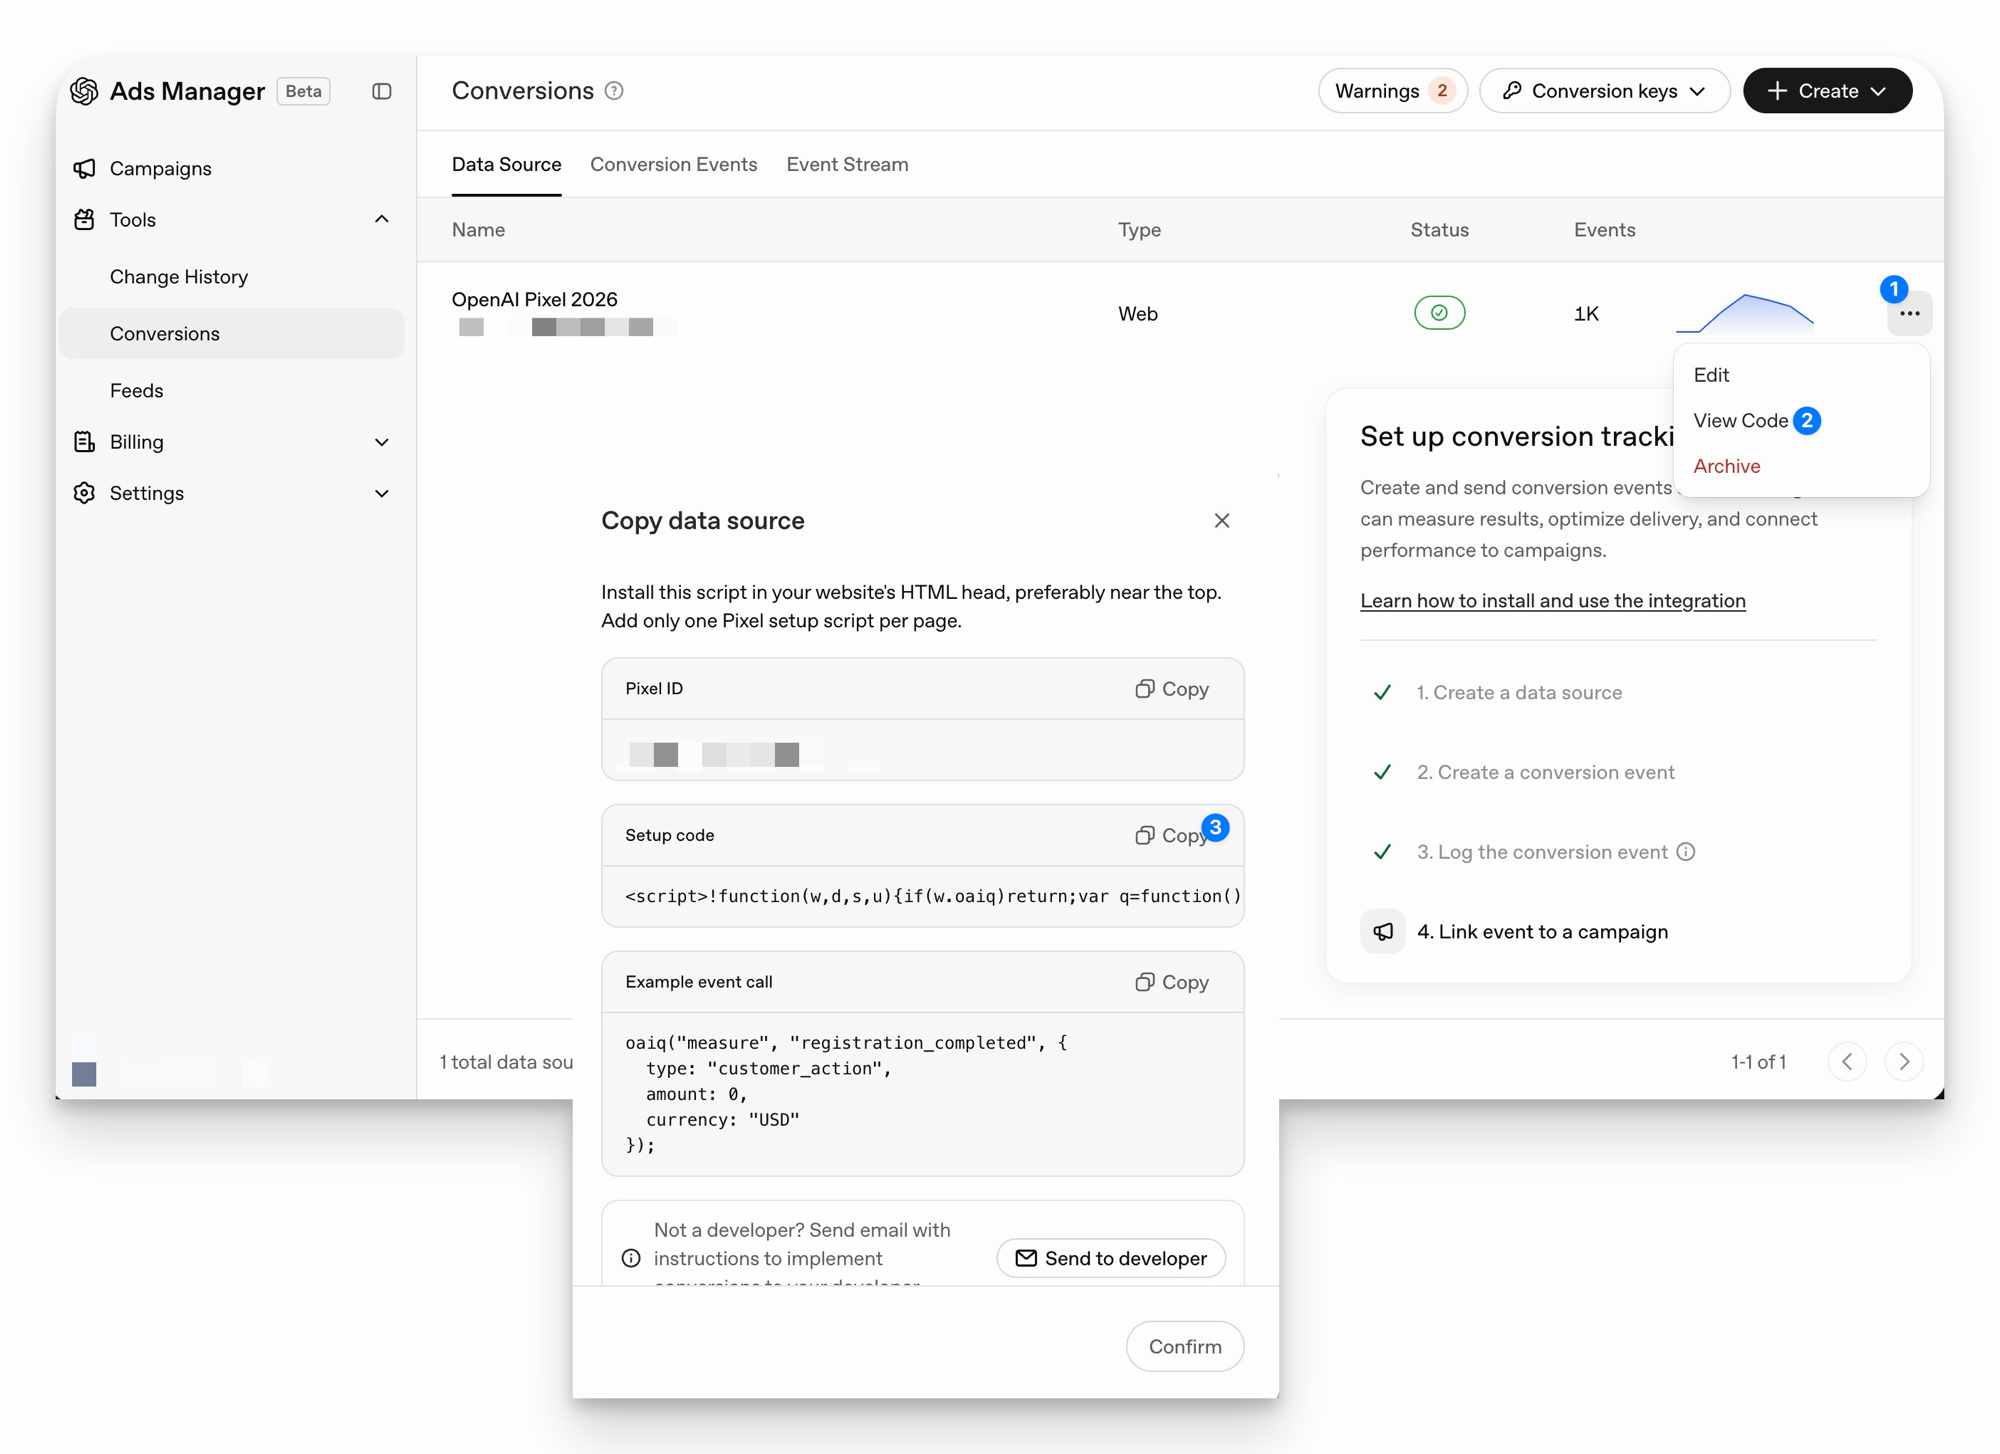
The full pixel code looks like this (replace <YOUR-PIXEL-ID> with your actual Pixel ID):
<script>
  (function (w, d, s, u) {
    if (w.oaiq) return;
    var q = function () {
      q.q.push(arguments);
    };
    q.q = [];
    w.oaiq = q;
    var js = d.createElement(s);
    js.async = true;
    js.src = u;
    var f = d.getElementsByTagName(s)[0];
    f.parentNode.insertBefore(js, f);
  })(window, document, "script", "https://bzrcdn.openai.com/sdk/oaiq.min.js");

  oaiq("init", {
    pixelId: "<YOUR-PIXEL-ID>",
  });
</script>
Full reference: OpenAI Ads Measurement Pixel docs
For the trigger, select Initialization - All Pages.
This loads the pixel on every page of your site, before anything else fires. The complete tag should look like this:
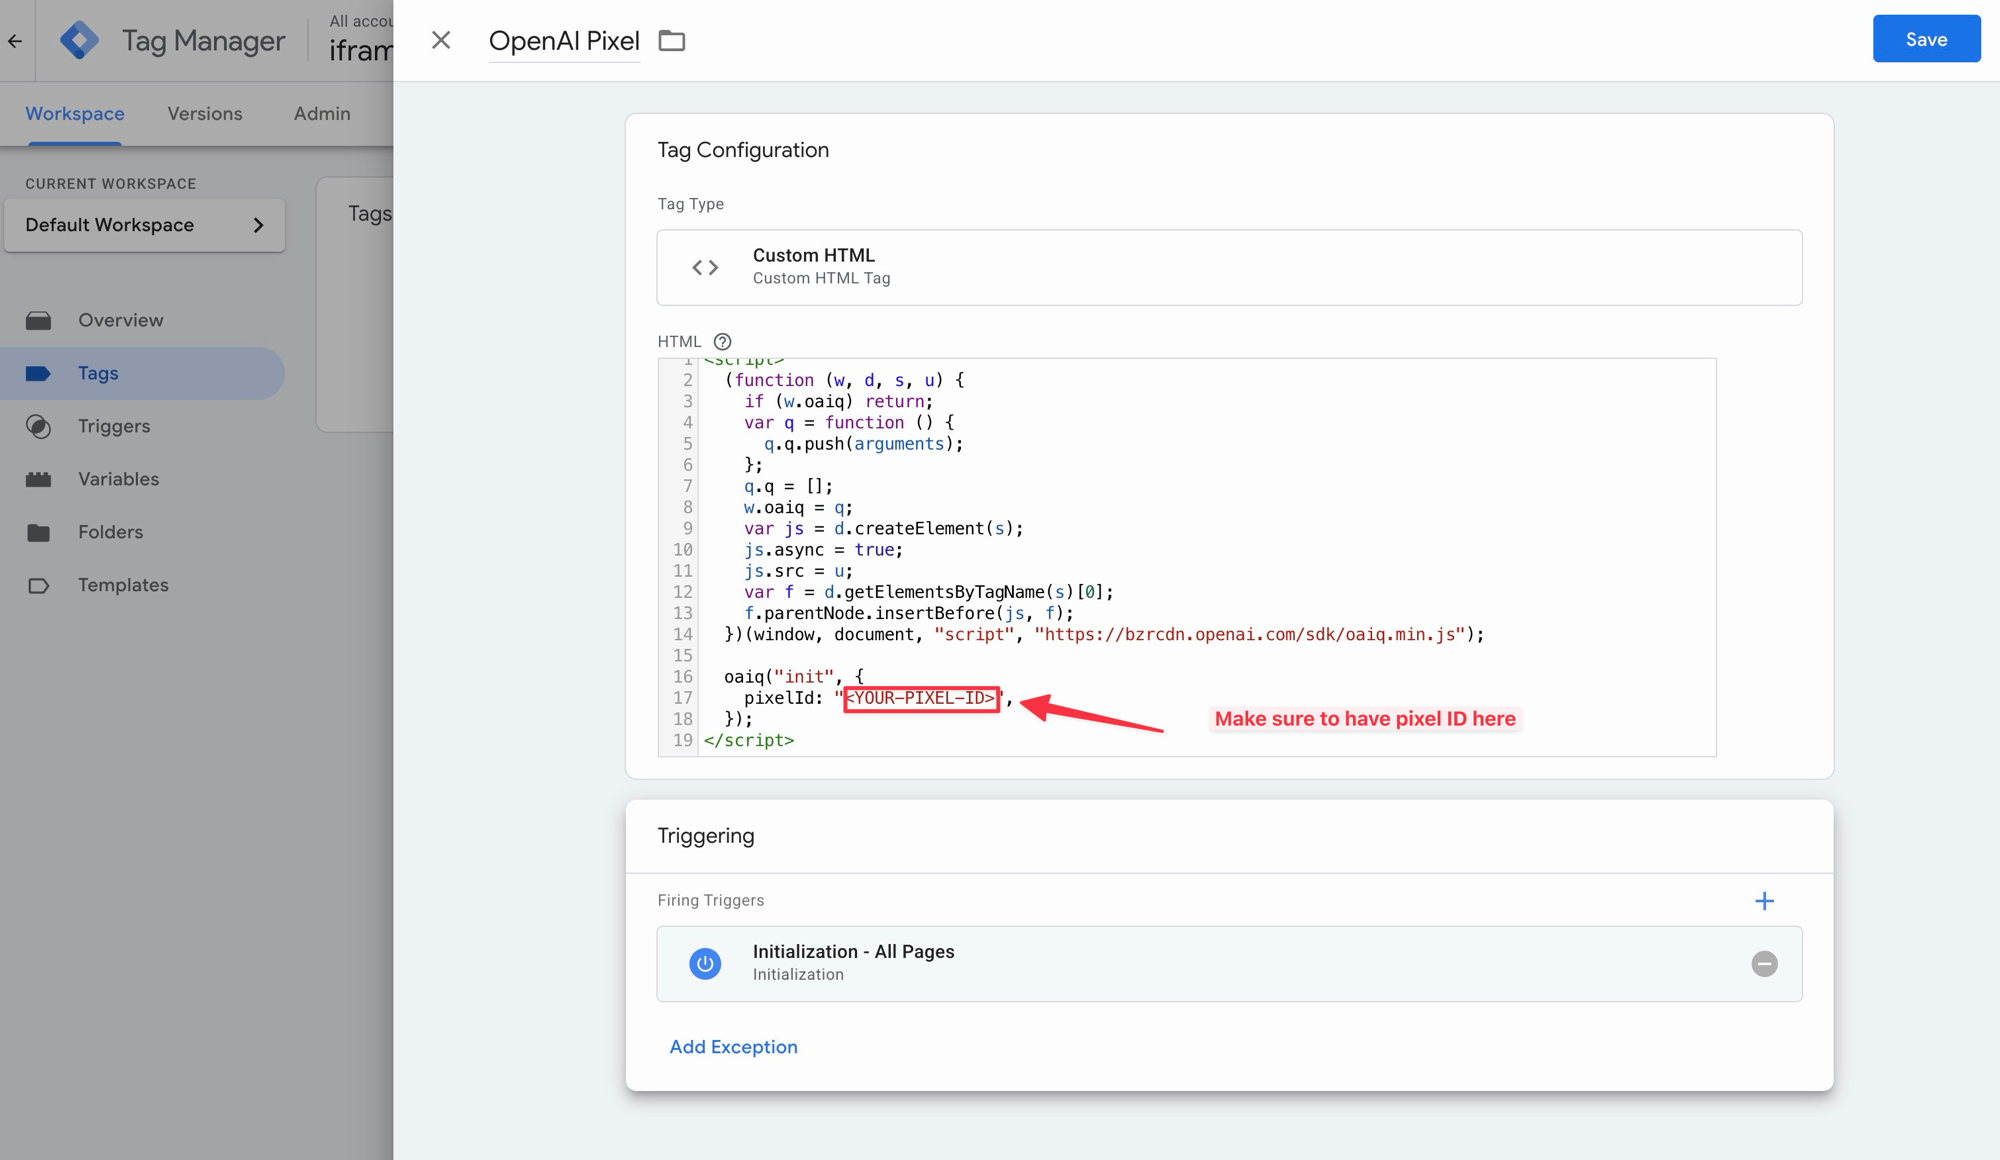
Save the tag.
Add the Page View Tag
In OpenAI Ads, go to Tools → Conversions → + Create → Conversion Event and pick Page View. Save it and copy the pixel event code.
This step is optional. OpenAI’s documentation is a bit unclear on whether you should track all page views or only specific high-value ones. If you’d rather skip this and just track the pages that actually matter — like a pricing page or a booking page — see the “Funnel pages as pre-conversion signals” example in the next section. Either approach works.
If you do want to track all page views, here’s how. This uses the page title as the event name:
In GTM, create another New Tag → Custom HTML and paste this:
<script>
  oaiq("measure", "page_viewed", {
    type: "contents",
    contents: [
      {
        name: document.title,
        content_type: "page",
      },
    ],
  });
</script>
No trigger needed here. Instead, use tag sequencing — in the tag’s Advanced Settings, set it to fire after the OpenAI Pixel tag. This guarantees the pixel is initialized before the page view fires. The finished tag should look like this:
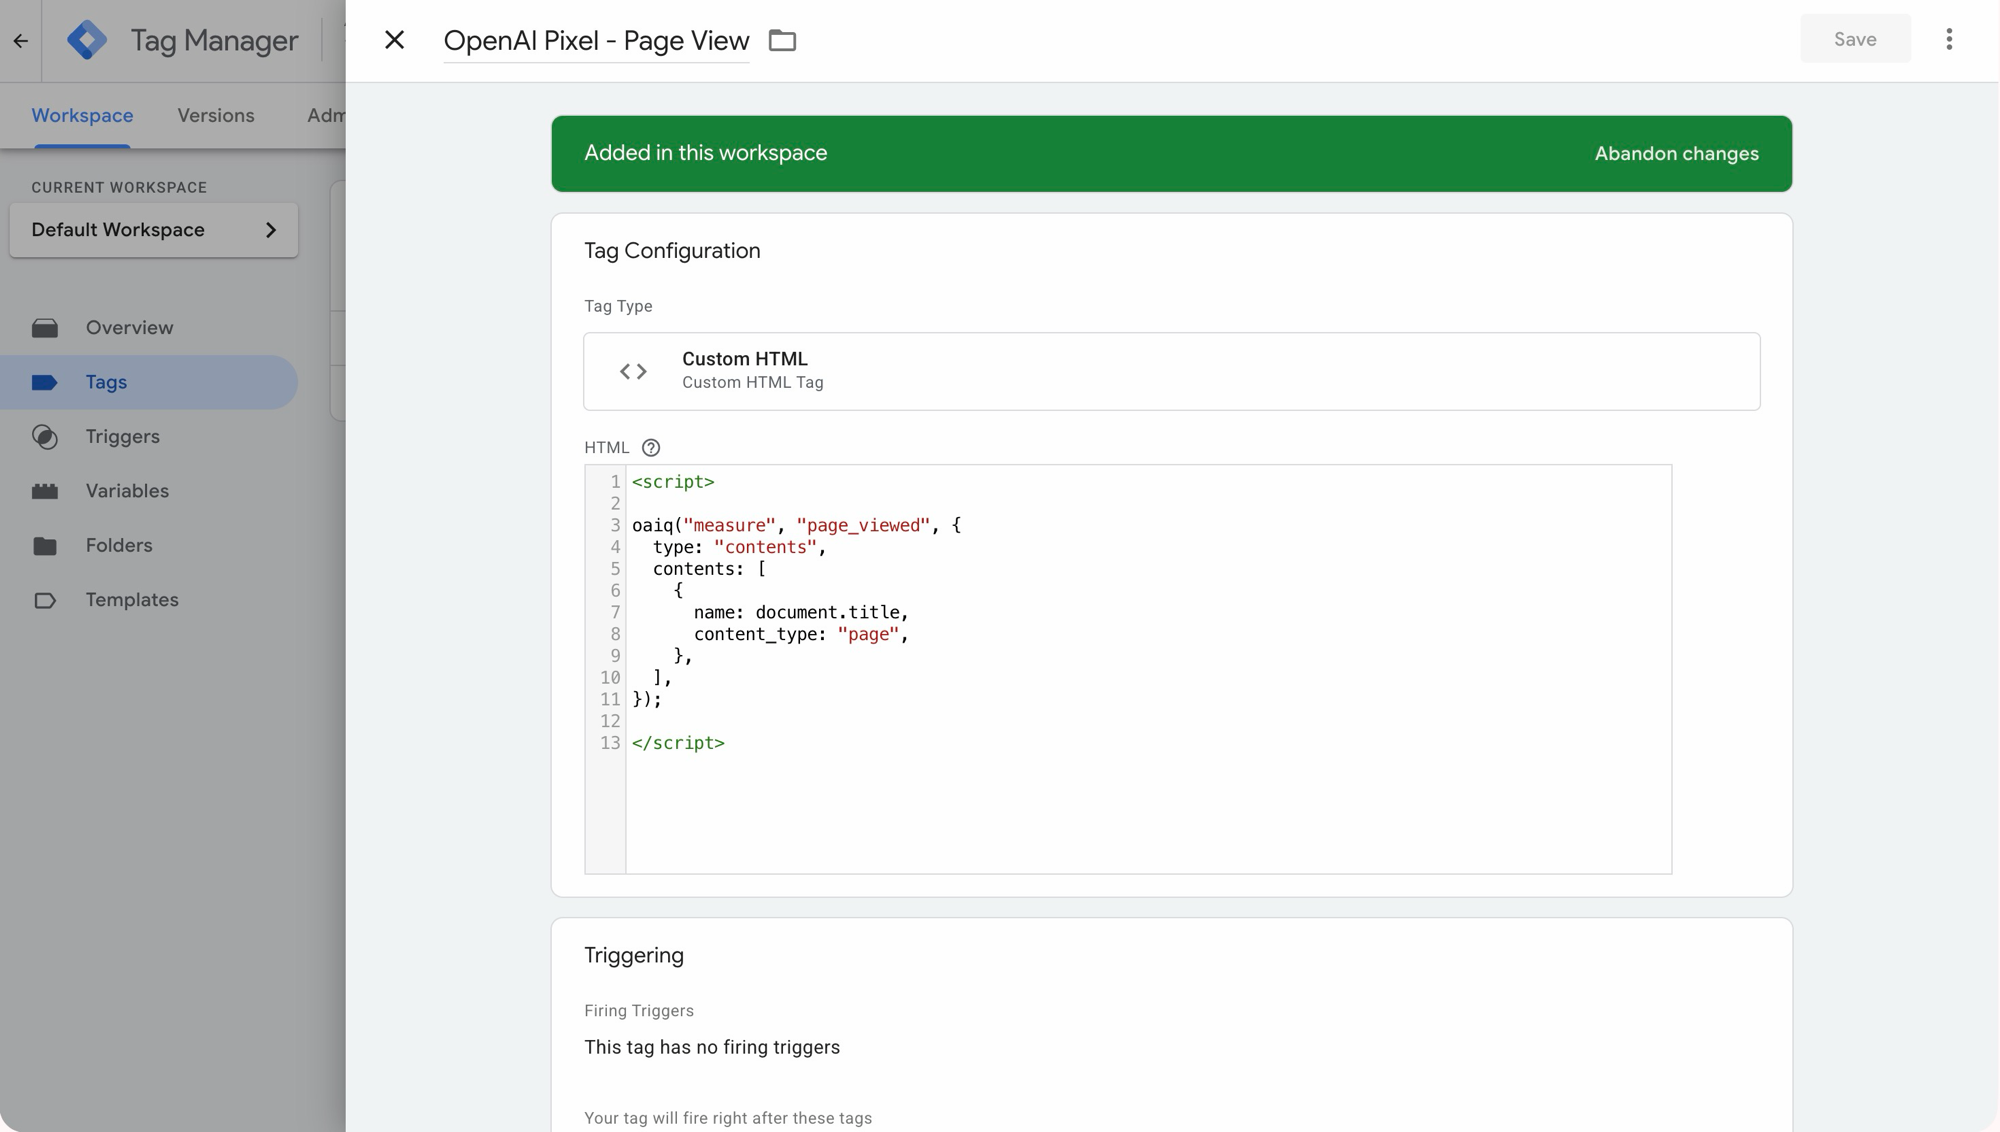
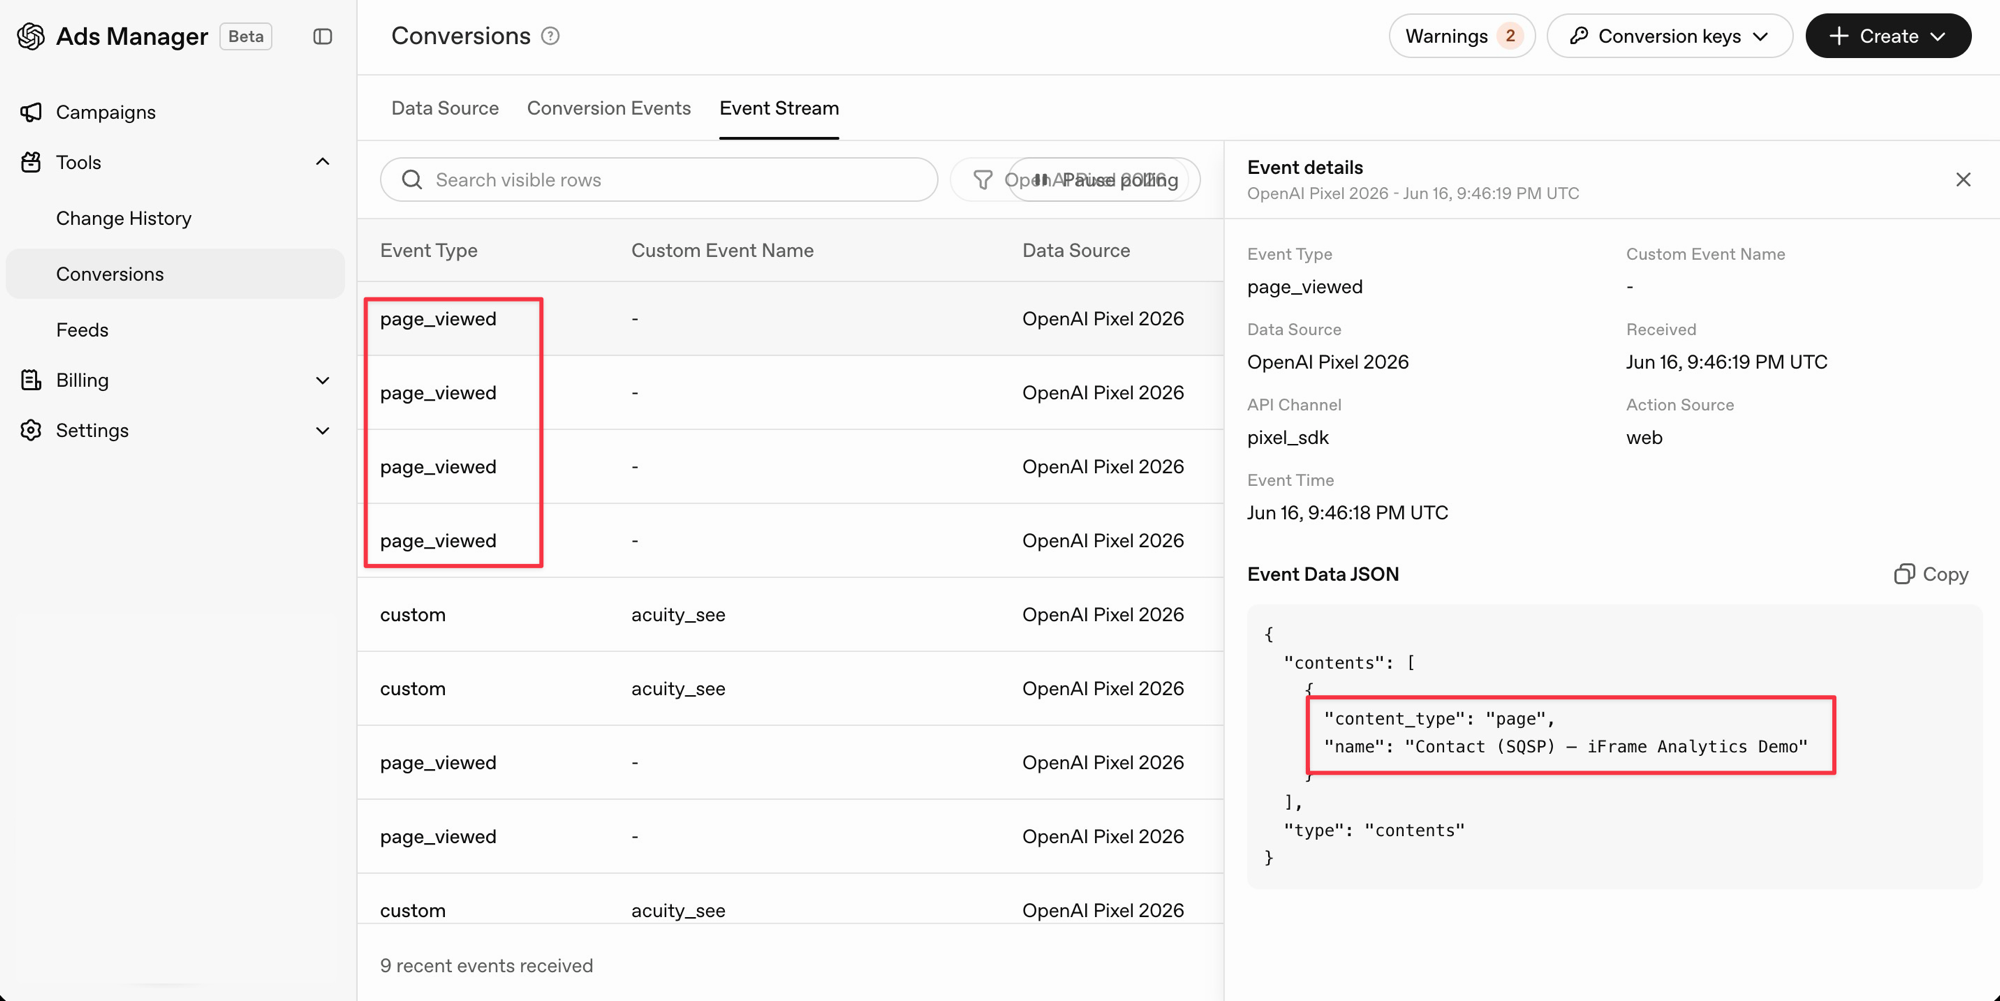
Save the tag. You should now see page_viewed events appearing in the OpenAI Event Stream when you browse your site — with the page title showing up in the Event Data JSON:
The Actual Conversions
Everything up to this point was the same for everyone. This part depends on what you want to track.
Each conversion needs three things: an event created in OpenAI Ads, a trigger in GTM that detects the action, and a tag in GTM that fires the event. Pick the example that matches your setup.
1. Contact Form Submission
Someone fills out your contact form and submits it. That’s a lead.
In OpenAI Ads: Go to Tools → Conversions → + Create → Conversion Event. Type: Lead. Select your pixel. Save it. Copy the event code that appears after saving (you can get it again later under View Code → Pixel tab).
GTM trigger: Create a new trigger, type Form Submission. Set it to fire on all forms, or target a specific form by ID or class if you have multiple forms on the page.
GTM tag: New tag, type Custom HTML:
<script>
oaiq("measure", "lead_created", { type: "customer_action", currency: "USD" });
</script>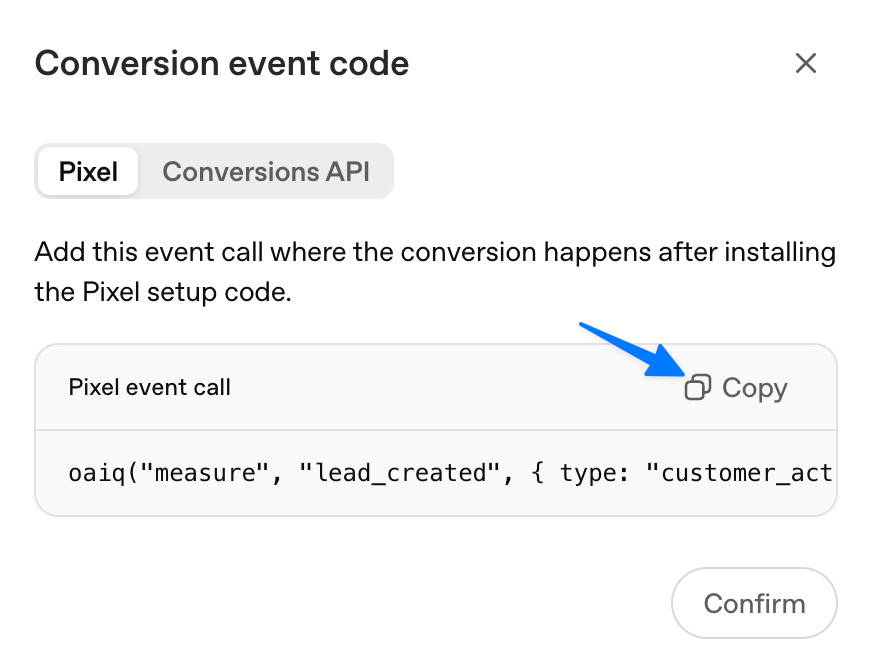
Works on WordPress, Squarespace, Webflow, and most standard contact forms.
2. Thank You Page View
If you redirect users to a /thank-you page after a form submit or sign-up, you can fire the conversion on that page load.
In OpenAI Ads: Same as above. Conversion event, type: Lead.
GTM trigger: Page View. Condition: Page URL contains /thank-you (or whatever your URL is).
GTM tag: Same lead_created code as Example 1.
Two things to watch out for with thank you page tracking:
Refresh duplicates. Every time a visitor reloads the page, your tag fires again. iOS Safari auto-reloads the last page when you open the app, so one real conversion can become two or three in your data. Fix this with a localStorage check:
<script>
if (!localStorage.getItem('oai_conversion_sent')) {
  oaiq("measure", "lead_created", { type: "customer_action", currency: "USD" });
  localStorage.setItem('oai_conversion_sent', '1');
}
</script>
PII in the URL. Some platforms append email addresses or order IDs to the thank you page URL. These get picked up by analytics tools and pollute your data. If you can use a form submit trigger instead (Example 1), do that.
Exclude the thank you page from search engines. You don’t want /thank-you showing up in Google results — it’s meaningless out of context and inflates your conversion data if someone lands on it directly from search. Add this to the <head> of your thank you page:
<meta name="robots" content="noindex, nofollow">On WordPress you can set this per-page in Yoast or Rank Math. On Squarespace, paste it into the page’s Header Code Injection. On Webflow, it’s under Page Settings → SEO → No Index.
Funnel pages as pre-conversion signals (alternative to tracking all pages)
Instead of tracking all page views, you can skip that step entirely and just track the pages that matter. A pricing page or demo request page is a meaningful intent signal even if the visitor doesn’t convert yet — and it’s cleaner than flooding your event stream with every page on the site.
In OpenAI Ads: Create a conversion event, type: Custom. Name it something like “Pricing Page View”.
GTM trigger: Page View. Condition: Page URL contains /pricing.
GTM tag:
<script>
oaiq("measure", "page_viewed", {
  type: "contents",
  contents: [{ name: "Pricing Page", content_type: "page" }],
});
</script>
This gives you a mid-funnel signal to optimize against once you have enough traffic.
3. E-Commerce Purchase
Someone buys something. You want to capture the order.
In OpenAI Ads: Conversion event, type: Order Created. Select your pixel. Copy the event code.
E-commerce is a bit trickier than a contact form. If you paste the OpenAI conversion code directly into your order confirmation page, it might execute before GTM — and the OpenAI pixel — has had time to load. You’d be calling oaiq() before it exists. Nothing fires.
The fix is a dataLayer push. Instead of calling the OpenAI pixel directly, your confirmation page pushes the order data into GTM’s dataLayer. GTM is already listening for it, and once it sees the event, it fires the OpenAI tag — after the pixel is guaranteed to be initialized.
On your order confirmation page, add this as early as possible (before GTM if you can, but it’s fine after too — GTM will catch it):
<script>
window.dataLayer = window.dataLayer || [];
window.dataLayer.push({
  event: "purchase",
  ecommerce: {
    transaction_id: "ORD-1234",
    value: 129.99,
    currency: "USD"
  }
});
</script>
Replace the hardcoded values with whatever your platform outputs dynamically — most e-commerce platforms have template variables for order total and transaction ID.
GTM trigger: Custom Event. Event name: purchase.
GTM variables: Create two Data Layer Variables — one for ecommerce.value, one for ecommerce.currency. You’ll use these in the tag so the real order value gets passed instead of a hardcoded number.
GTM tag: Custom HTML, fires on the purchase trigger:
<script>
oaiq("measure", "order_created", {
  type: "contents",
  amount: Math.round({{dlv - ecommerce.value}} * 100),
  currency: "{{dlv - ecommerce.currency}}",
});
</script>
The Math.round(value * 100) converts dollars to cents — OpenAI expects the amount in minor currency units, so $129.99 becomes 12999.
Platform note: Shopify and WooCommerce need platform-specific setups. Shopify’s checkout blocks direct GTM access and requires a custom pixel. WooCommerce has its own data layer format. Detailed guides for both coming later.
Test the Conversions
Before testing, re-click Preview in GTM. Any tags you added after the last Preview session won’t show up unless you do.
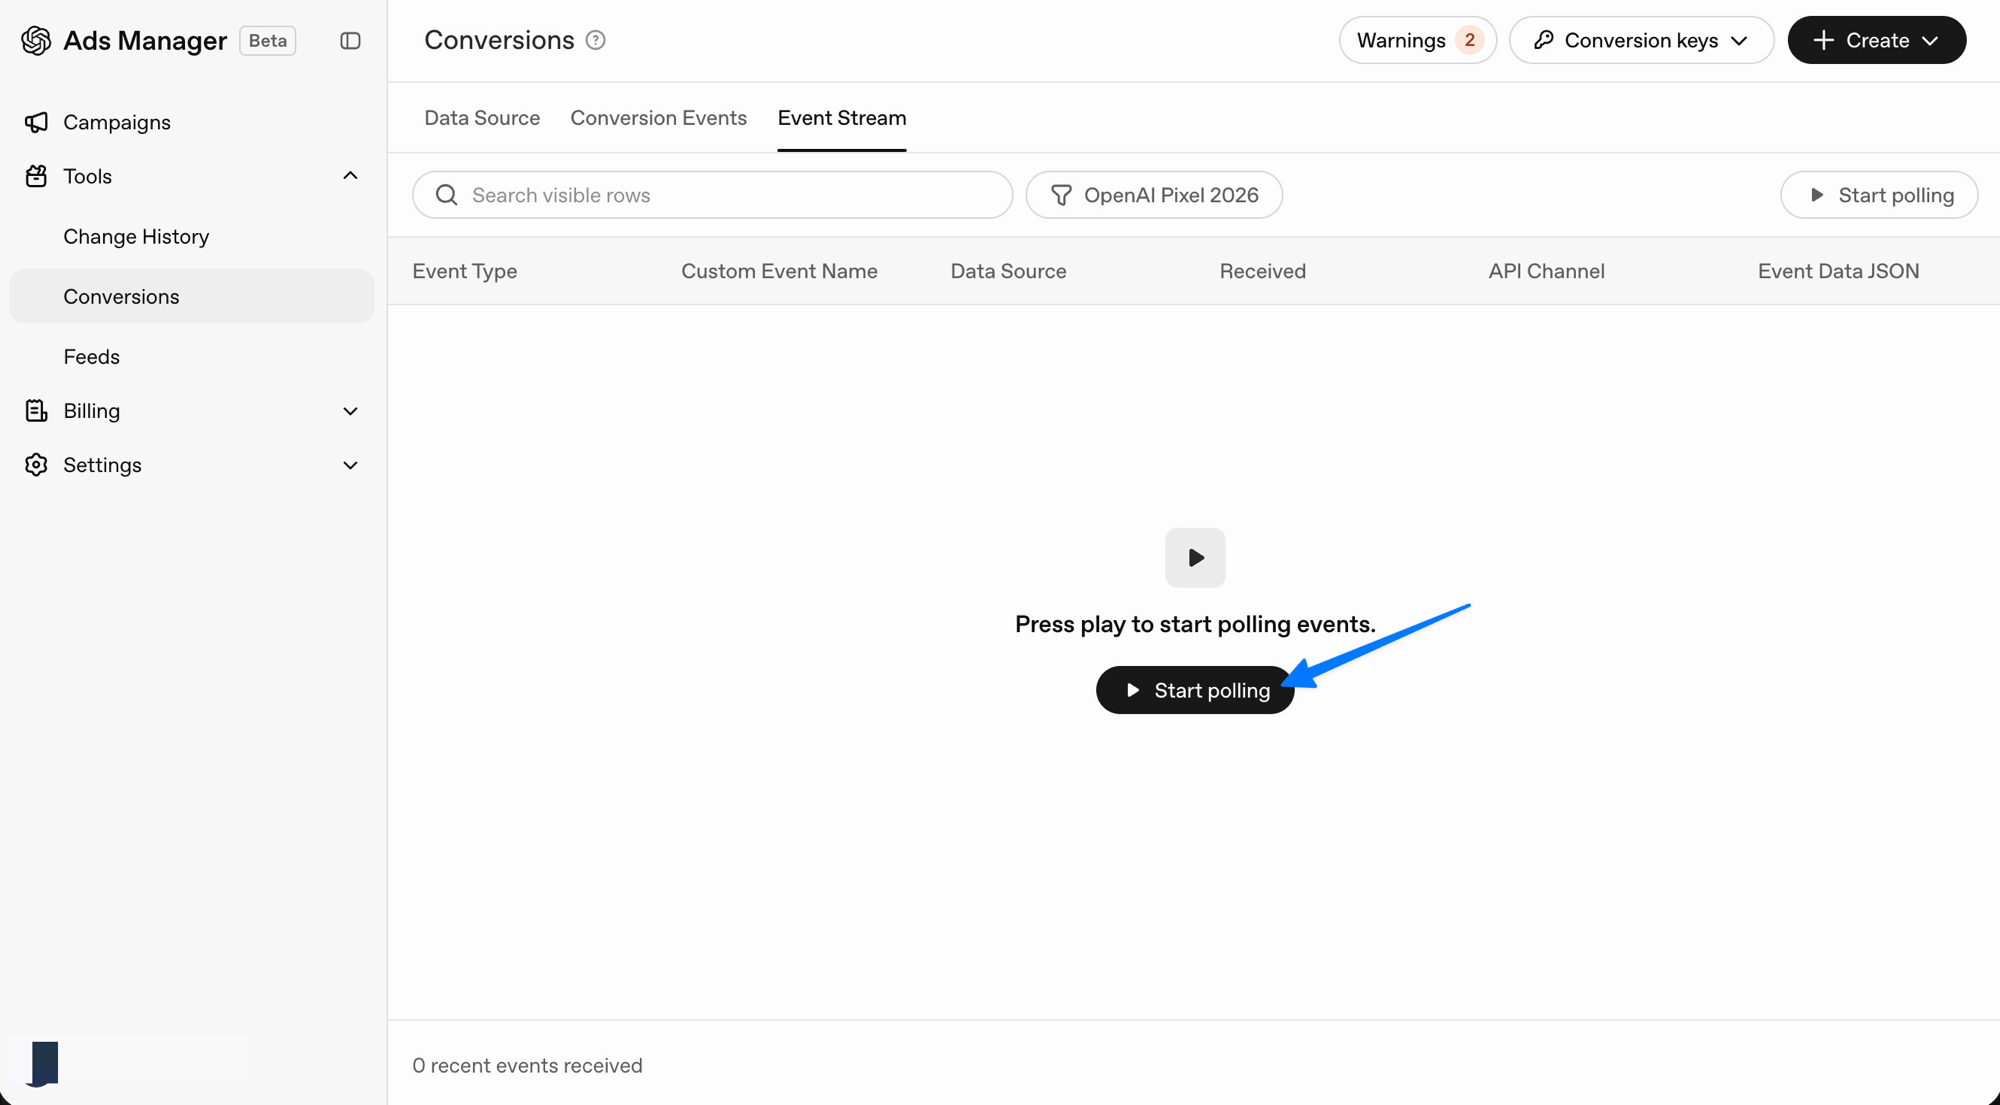
In the OpenAI Ads dashboard, go to Tools → Conversions → Event Stream and click Start Polling.
You can also install the OpenAI Ads Pixel Helper Chrome extension. It shows which OpenAI events are firing on any page in real time.
Now trigger the conversion. Fill out and submit your contact form, visit your thank you page, or complete a test purchase depending on which example you set up.
You should see the conversion appear in all three places:
- Tag Assistant — the conversion tag firing
- Pixel Helper — the event showing up in the extension
- OpenAI Event Stream — the event arriving in the dashboard
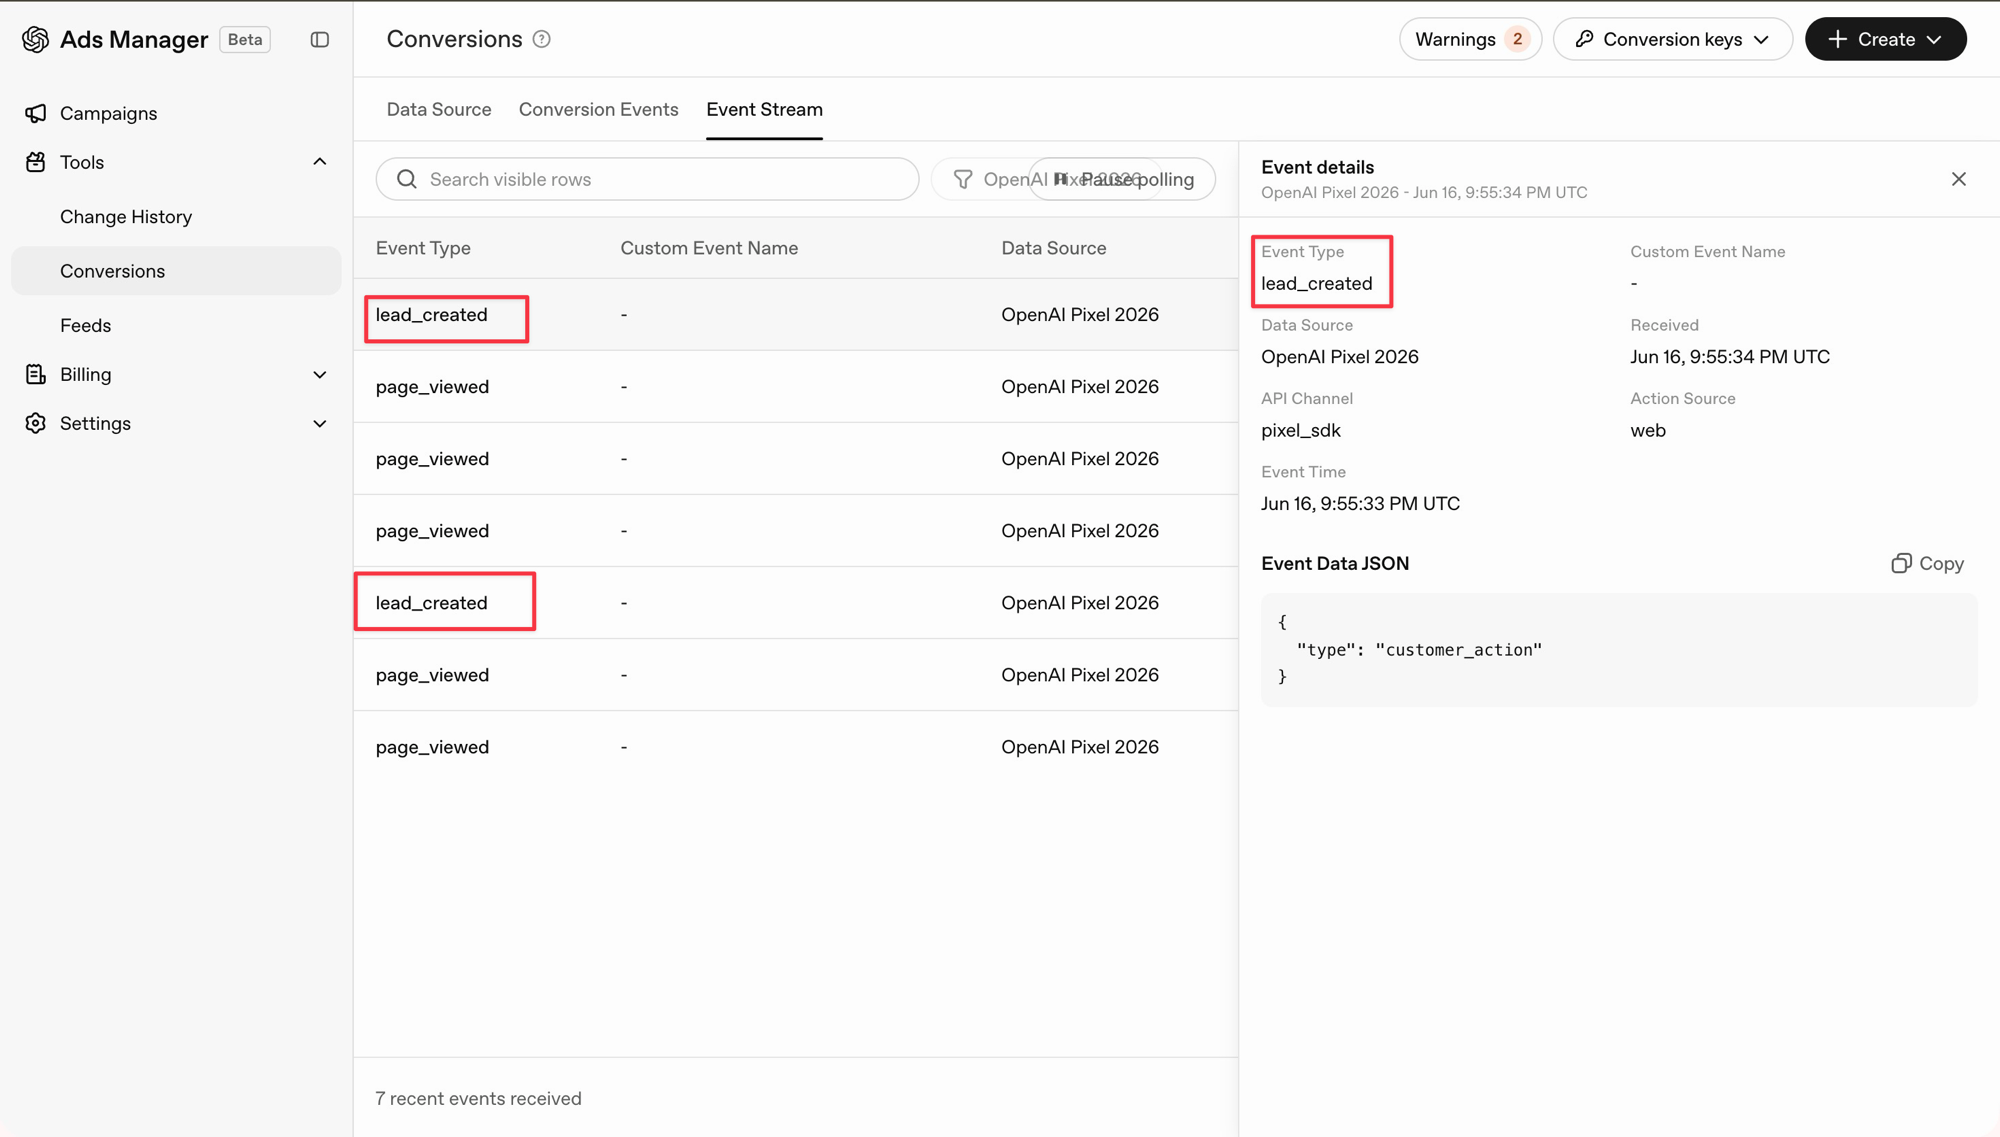
If all three show up, you’re done.
Publish
In GTM, click Submit → Publish.
Your pixel and conversion tracking are now live. Go run some ads.
Also Do This: UTM Parameters
While you’re setting up your ads, add UTM parameters to every ad URL. It takes 30 seconds and gives you a baseline in Google Analytics even before your pixel data matures.
When creating an ad, paste your destination URL with UTMs in the Link field:
https://yoursite.com?utm_source=openai-ads&utm_medium=cpc&utm_campaign=campaign-name&utm_content=ad-nameReplace campaign-name with something readable like wedding-suits-july and utm_content with the specific ad variant if you’re A/B testing.
In Google Analytics 4, go to Reports → Acquisition → Traffic acquisition and filter by Session source = openai-ads. You’ll see clicks, sessions, and any goal completions — no pixel required.
The catch: GA4 misses roughly 30% of traffic due to ad blockers, cookie consent opt-outs, and iOS privacy restrictions. It’s useful for a quick sanity check, not for optimization decisions.
More importantly: GA4 has no connection to OpenAI. Even if GA4 shows 50 conversions, OpenAI’s algorithm doesn’t see any of them. It can’t learn who converted or find more people like them. That’s why the pixel setup above matters — UTMs get you visibility, the pixel is what actually improves your results.
Use both. UTMs for the GA4 overview, pixel for feeding the algorithm.
What’s Next: Pixel vs CAPI
This setup uses pixel-based tracking — JavaScript running in the visitor’s browser.
It works. But it has limits.
With Meta Ads, pixel tracking typically loses 40–60% of conversions due to:
- Ad blockers
- iOS privacy restrictions (Apple’s Intelligent Tracking Prevention)
- Cookie consent opt-outs
ChatGPT Ads are too new to have solid data on this yet — but the same browser-level limitations apply.
This basic pixel setup is the right starting point. See if the ads work first. If they do — upgrade to the OpenAI Conversions API (CAPI) setup, which sends conversion data server-to-server and is not affected by browsers or blockers. More accurate data means better ad optimization.
More on CAPI setup coming soon.